Use Google Sheets as a Database and Backend

Google Sheets is one of the most popular services to store data easily. Unlike traditional Excel sheets, Google Sheets, while providing excellent support for tabular data, ensures all the data is automatically stored in the cloud. This gives the unique benefit of using it as a Database for most user-facing applications.
In this article, we will walk through the process of using Google Sheets as a database and Apico APIs as the backend for building applications quickly.
If you'd like to explore the code on your own, you can checkout the source code of our example Todo app built with Google Sheets as a backend.
Head over to apico.dev to create your free account and get started right away.
Pre-requisites: Prepare your Google Sheet to be used as a database
To use a Google Sheets as a database, we need to ensure the data stored is standardized. This means the data stored in your sheet should be CSV-friendly along with other requirements as mentioned below -
- The first row should only contain the headers/column names.
- The sheet should not have merged columns or rows (i.e. One cell should only contain one value).
- The records should be stored sequencially without any blank rows in between.
- All values should be stored under their respective column headers.
- The data should only contain text-based data and no images or other special elements in the sheet.
- Do not keep changing the data format, column names or positions. Preserve the integrity of the data.
- Add necessary default columns to each row, such as
created_atcolumn, if required. - It's recommended to have a unique identifier column, such as
idor primary key for each row.
Create a new Google Sheets API with Apico
Once you are ready with a Sheet, you can head over to your Apico account to create a new Google Sheets API.
- Click on Create new API button, and select Google Sheets.
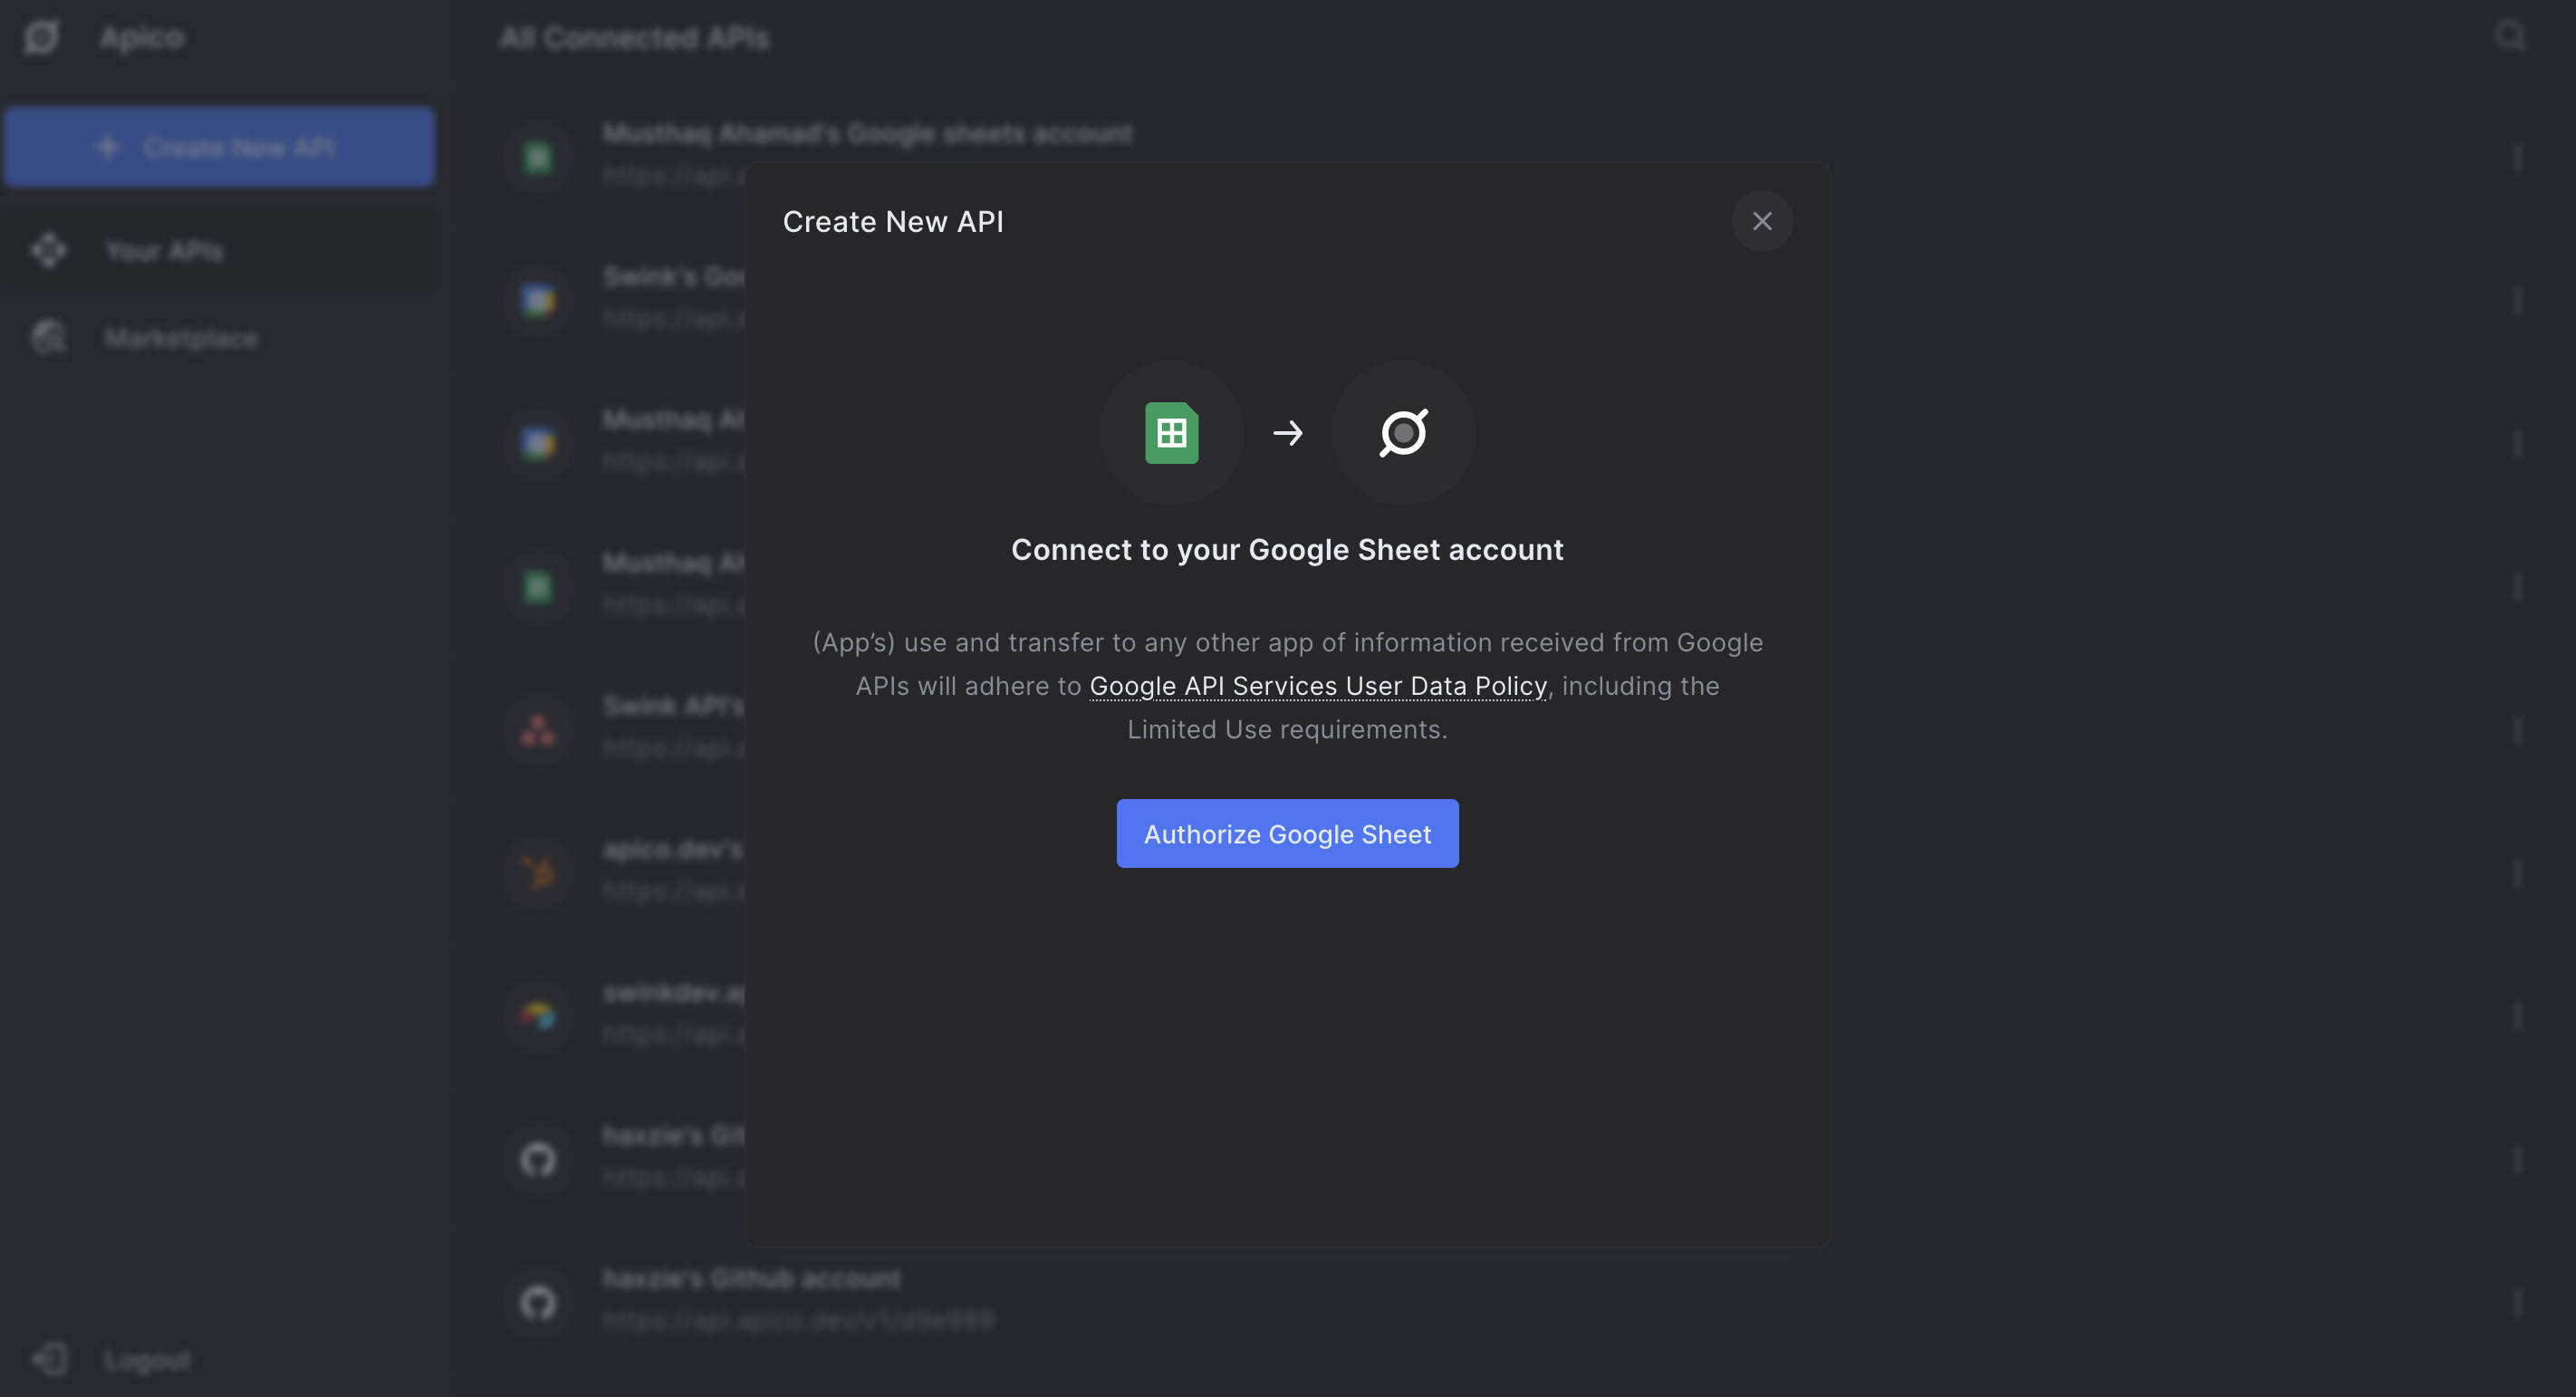
- Click on Authorize. On the OAuth screen, pick the Google account which has your Sheet stored (this is really important). Ensure your email has view/edit access to the Sheet you want to connect.
Once you have successfully integrated your Google account to Apico, you will see Apico's API explorer screen with all the APIs ready to use.
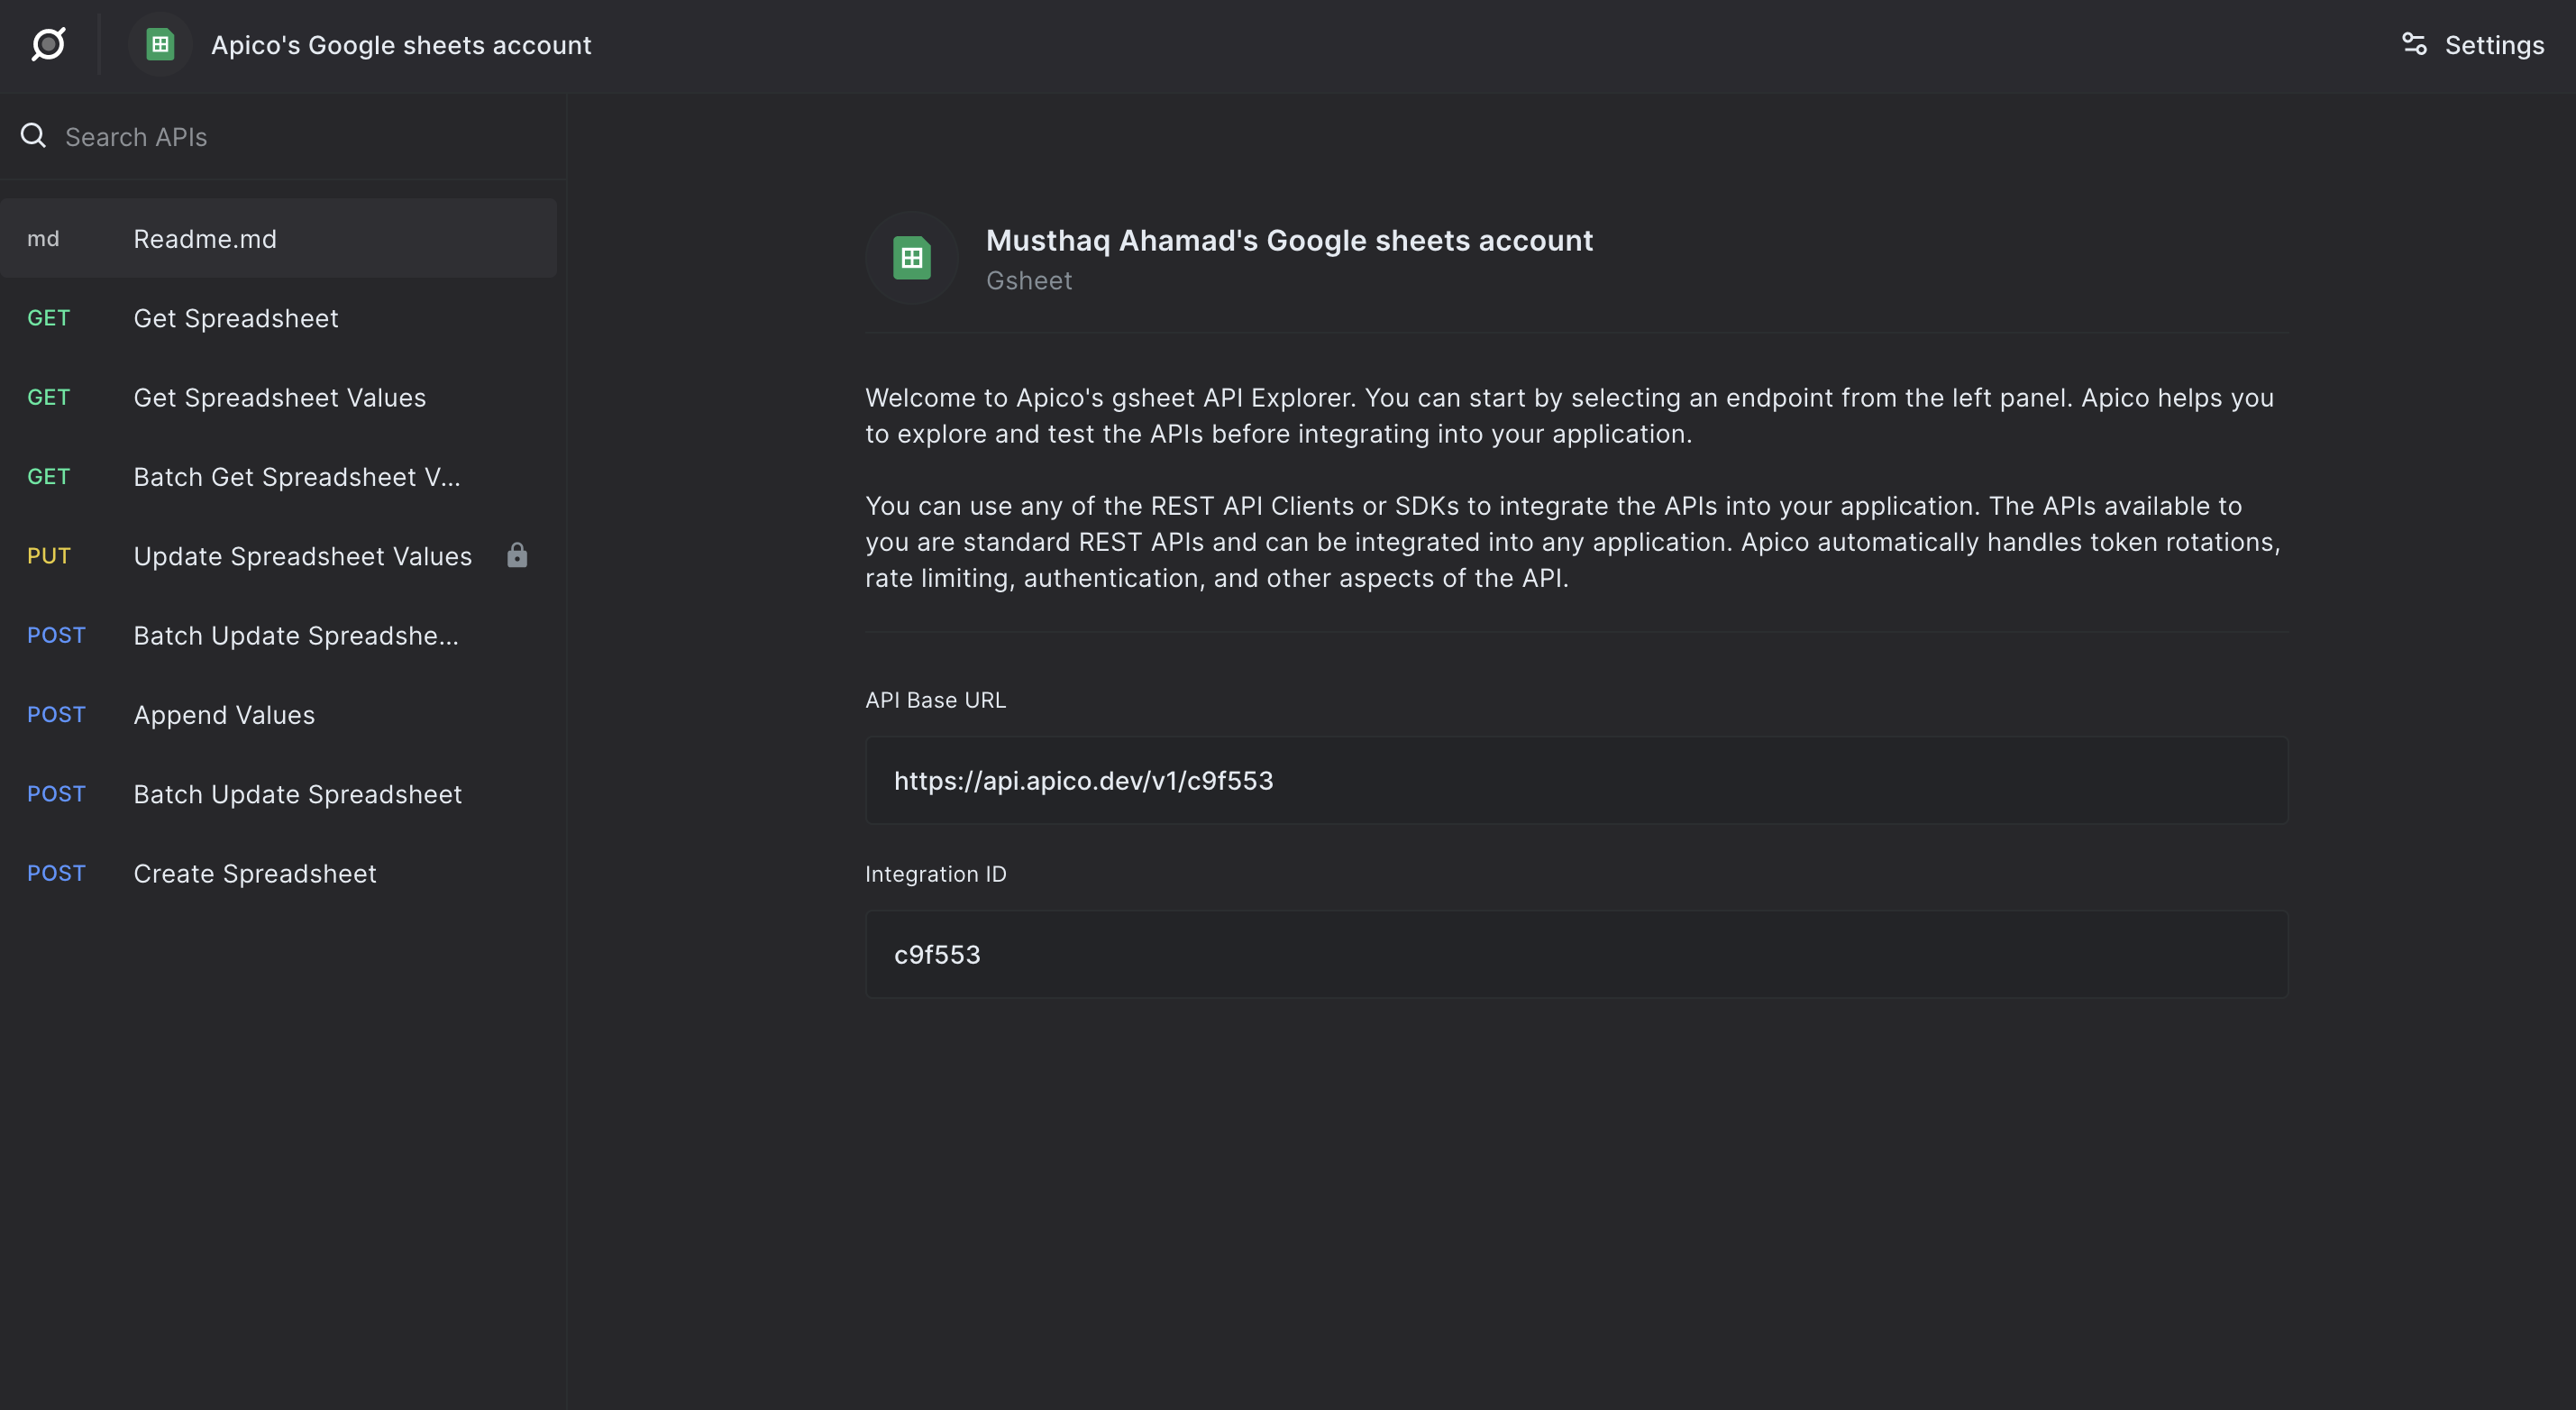
In Apico's API explorer, you will now be able to view all the available APIs to interact with Google Sheets in your account. You will find most of the APIs required to use Google Sheets as a database and backend here.
Currently Apico supports the following APIs -
- Get a spreadsheet details
- Append values to a spreadsheet (Insert)
- Get values of a spreadsheet
- Creating a new Google Sheet
You can also use the Apico APIs to Update values of a spreadsheet as well.
Let's get started with using the APIs.
Use Apico's Google Sheets APIs to get a spreadsheet
From the API explorer on the left, click on Get Spreadsheet. You can now get the details of any spreadsheet in your Google Account.
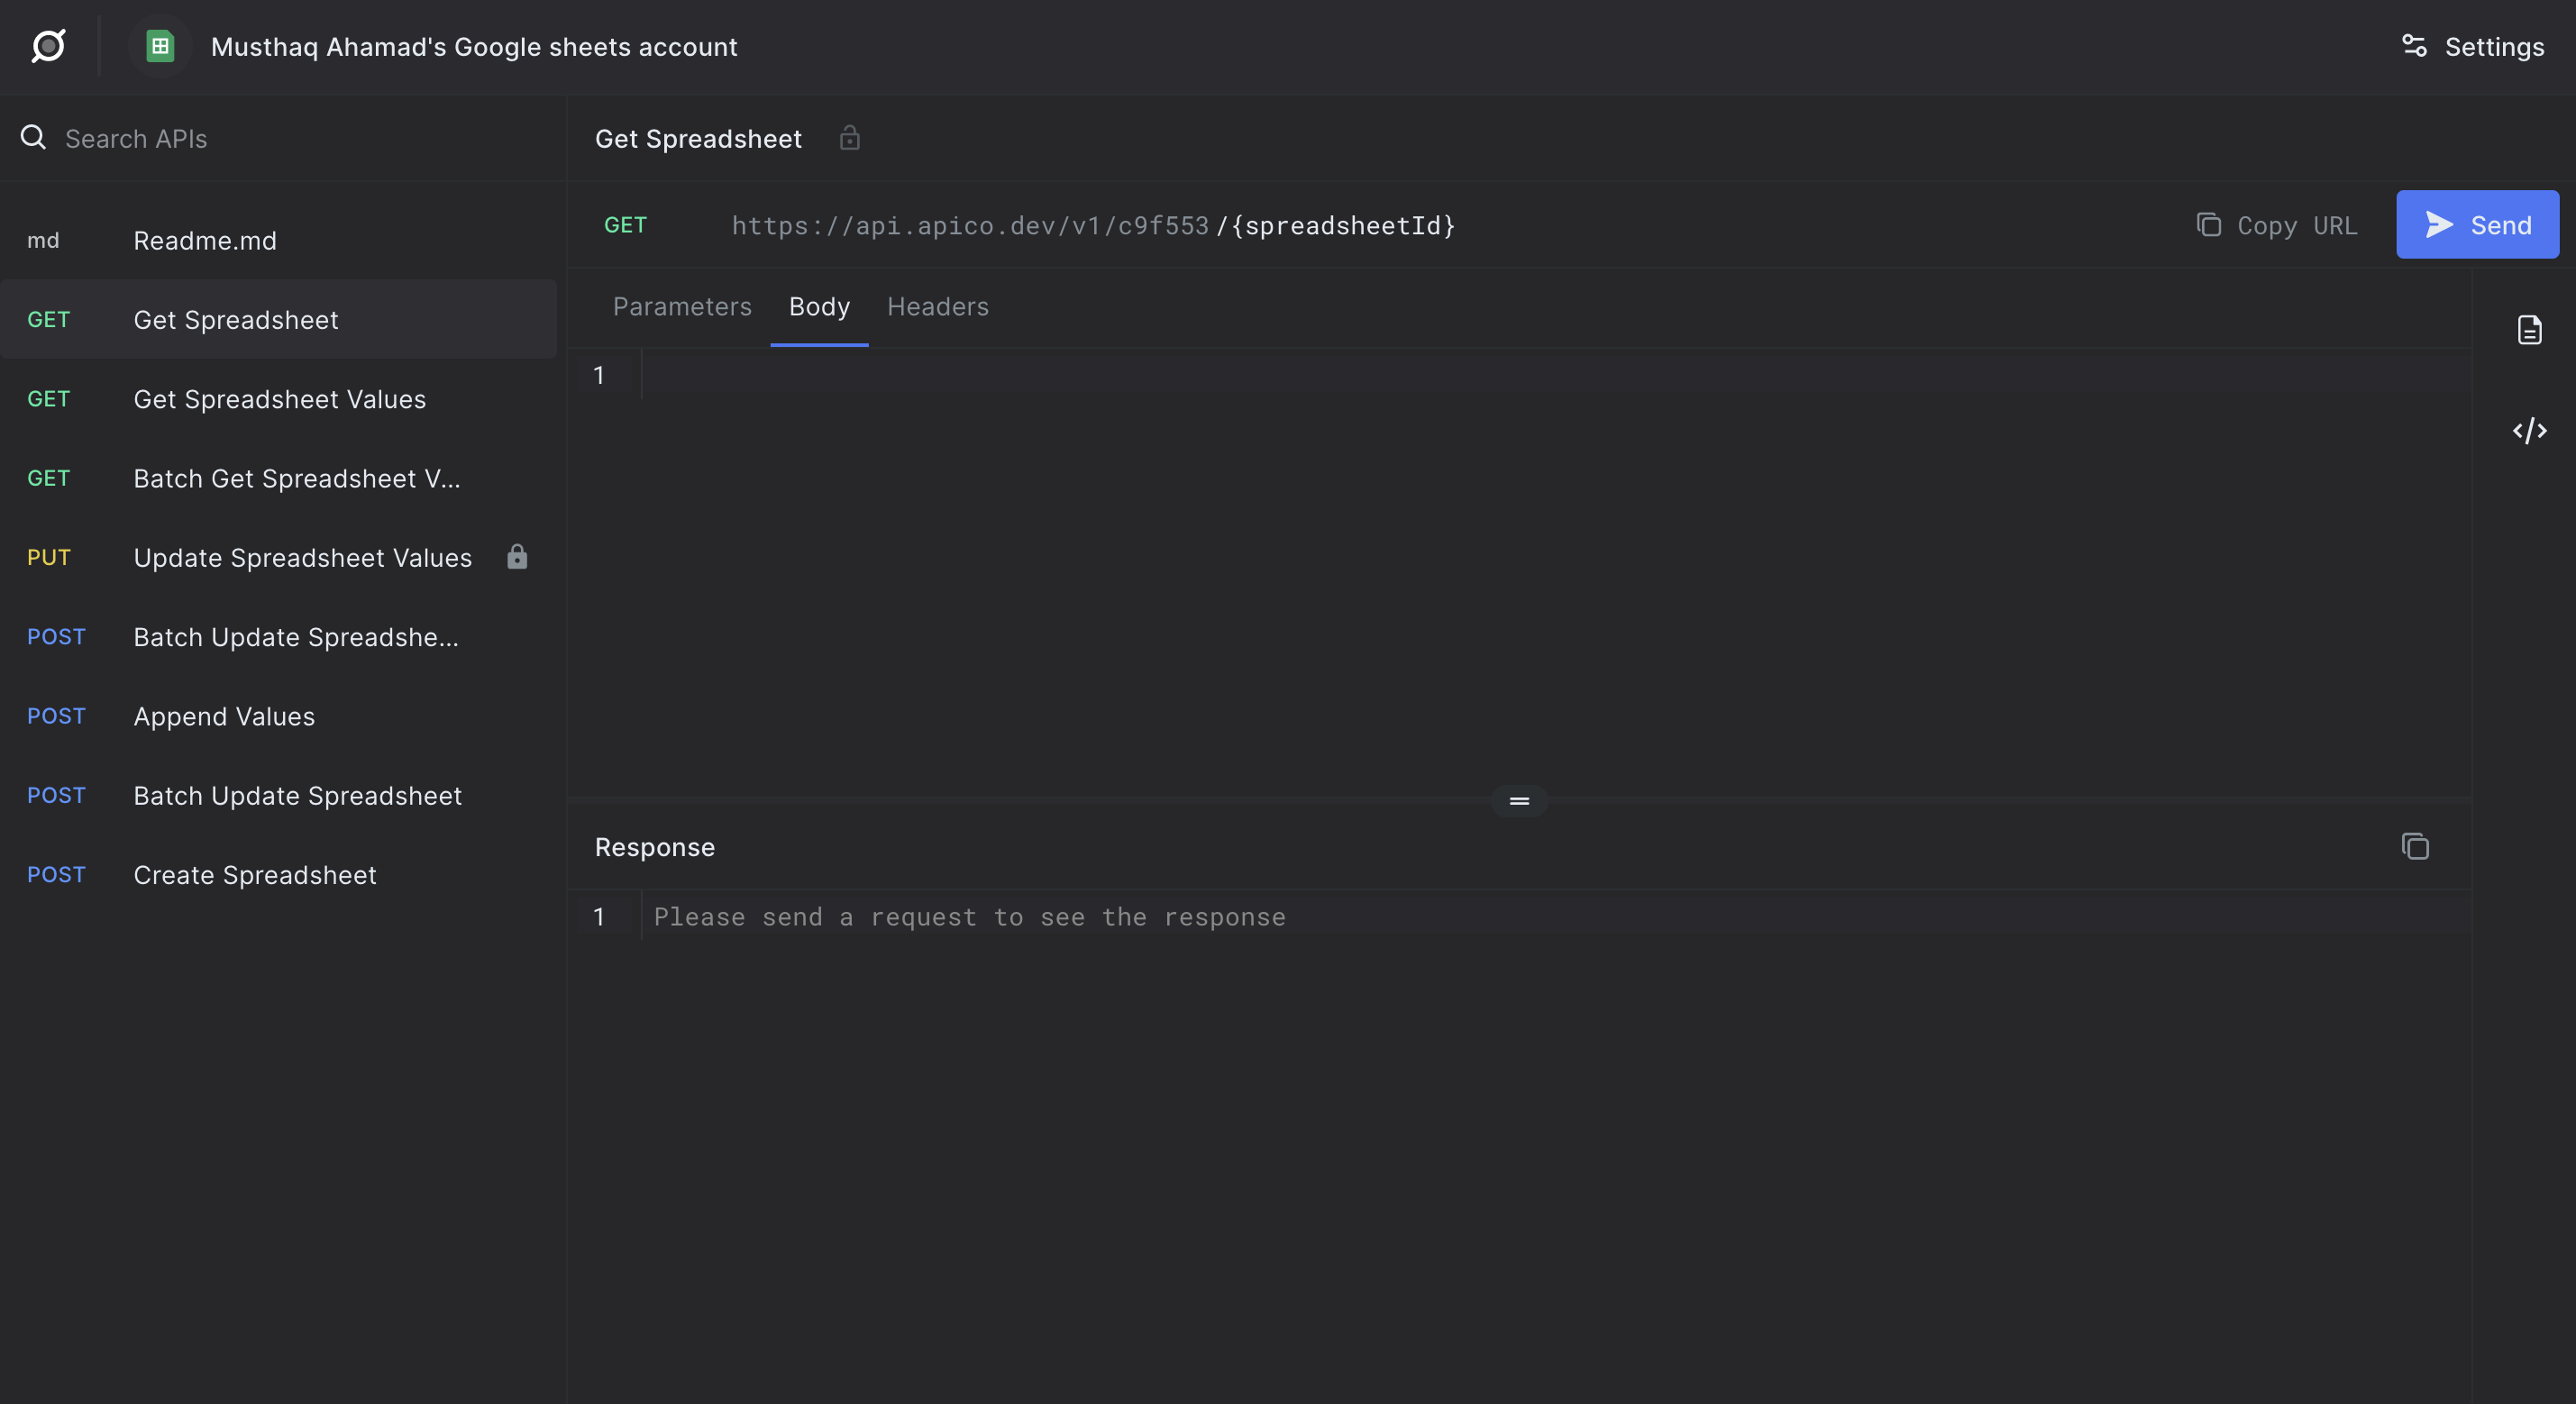
The API endpoint will look similar to this -
https://api.apico.dev/v1/34sd34b/{spreadsheetId}
Here, the {spreadsheetId} needs to be replaced by the unique id of the spreadsheet you wish to use as a database.
1. Get spreadsheet id
The URL of your spreadsheet you want to use as the database will look similar to this -
https://docs.google.com/spreadsheets/d/15jmjk934nsdkj3434sdVaY8Lb28zk7DxnymDZ88ABIM/edit#gid=0
The spreadsheet id will be the string of characters after /d/.

In this example, the spreadsheet id is 15jmjk934nsdkj3434sdVaY8Lb28zk7DxnymDZ88ABIM.
Copy your spreadsheet id, head back to Apico.
2. Use the spreadsheet id in Apico
In the Apico API explorer, replace the {spreadsheetId} with the spreadsheet Id you just copied.

3. Send your Google Sheets API request to get a spreadsheet
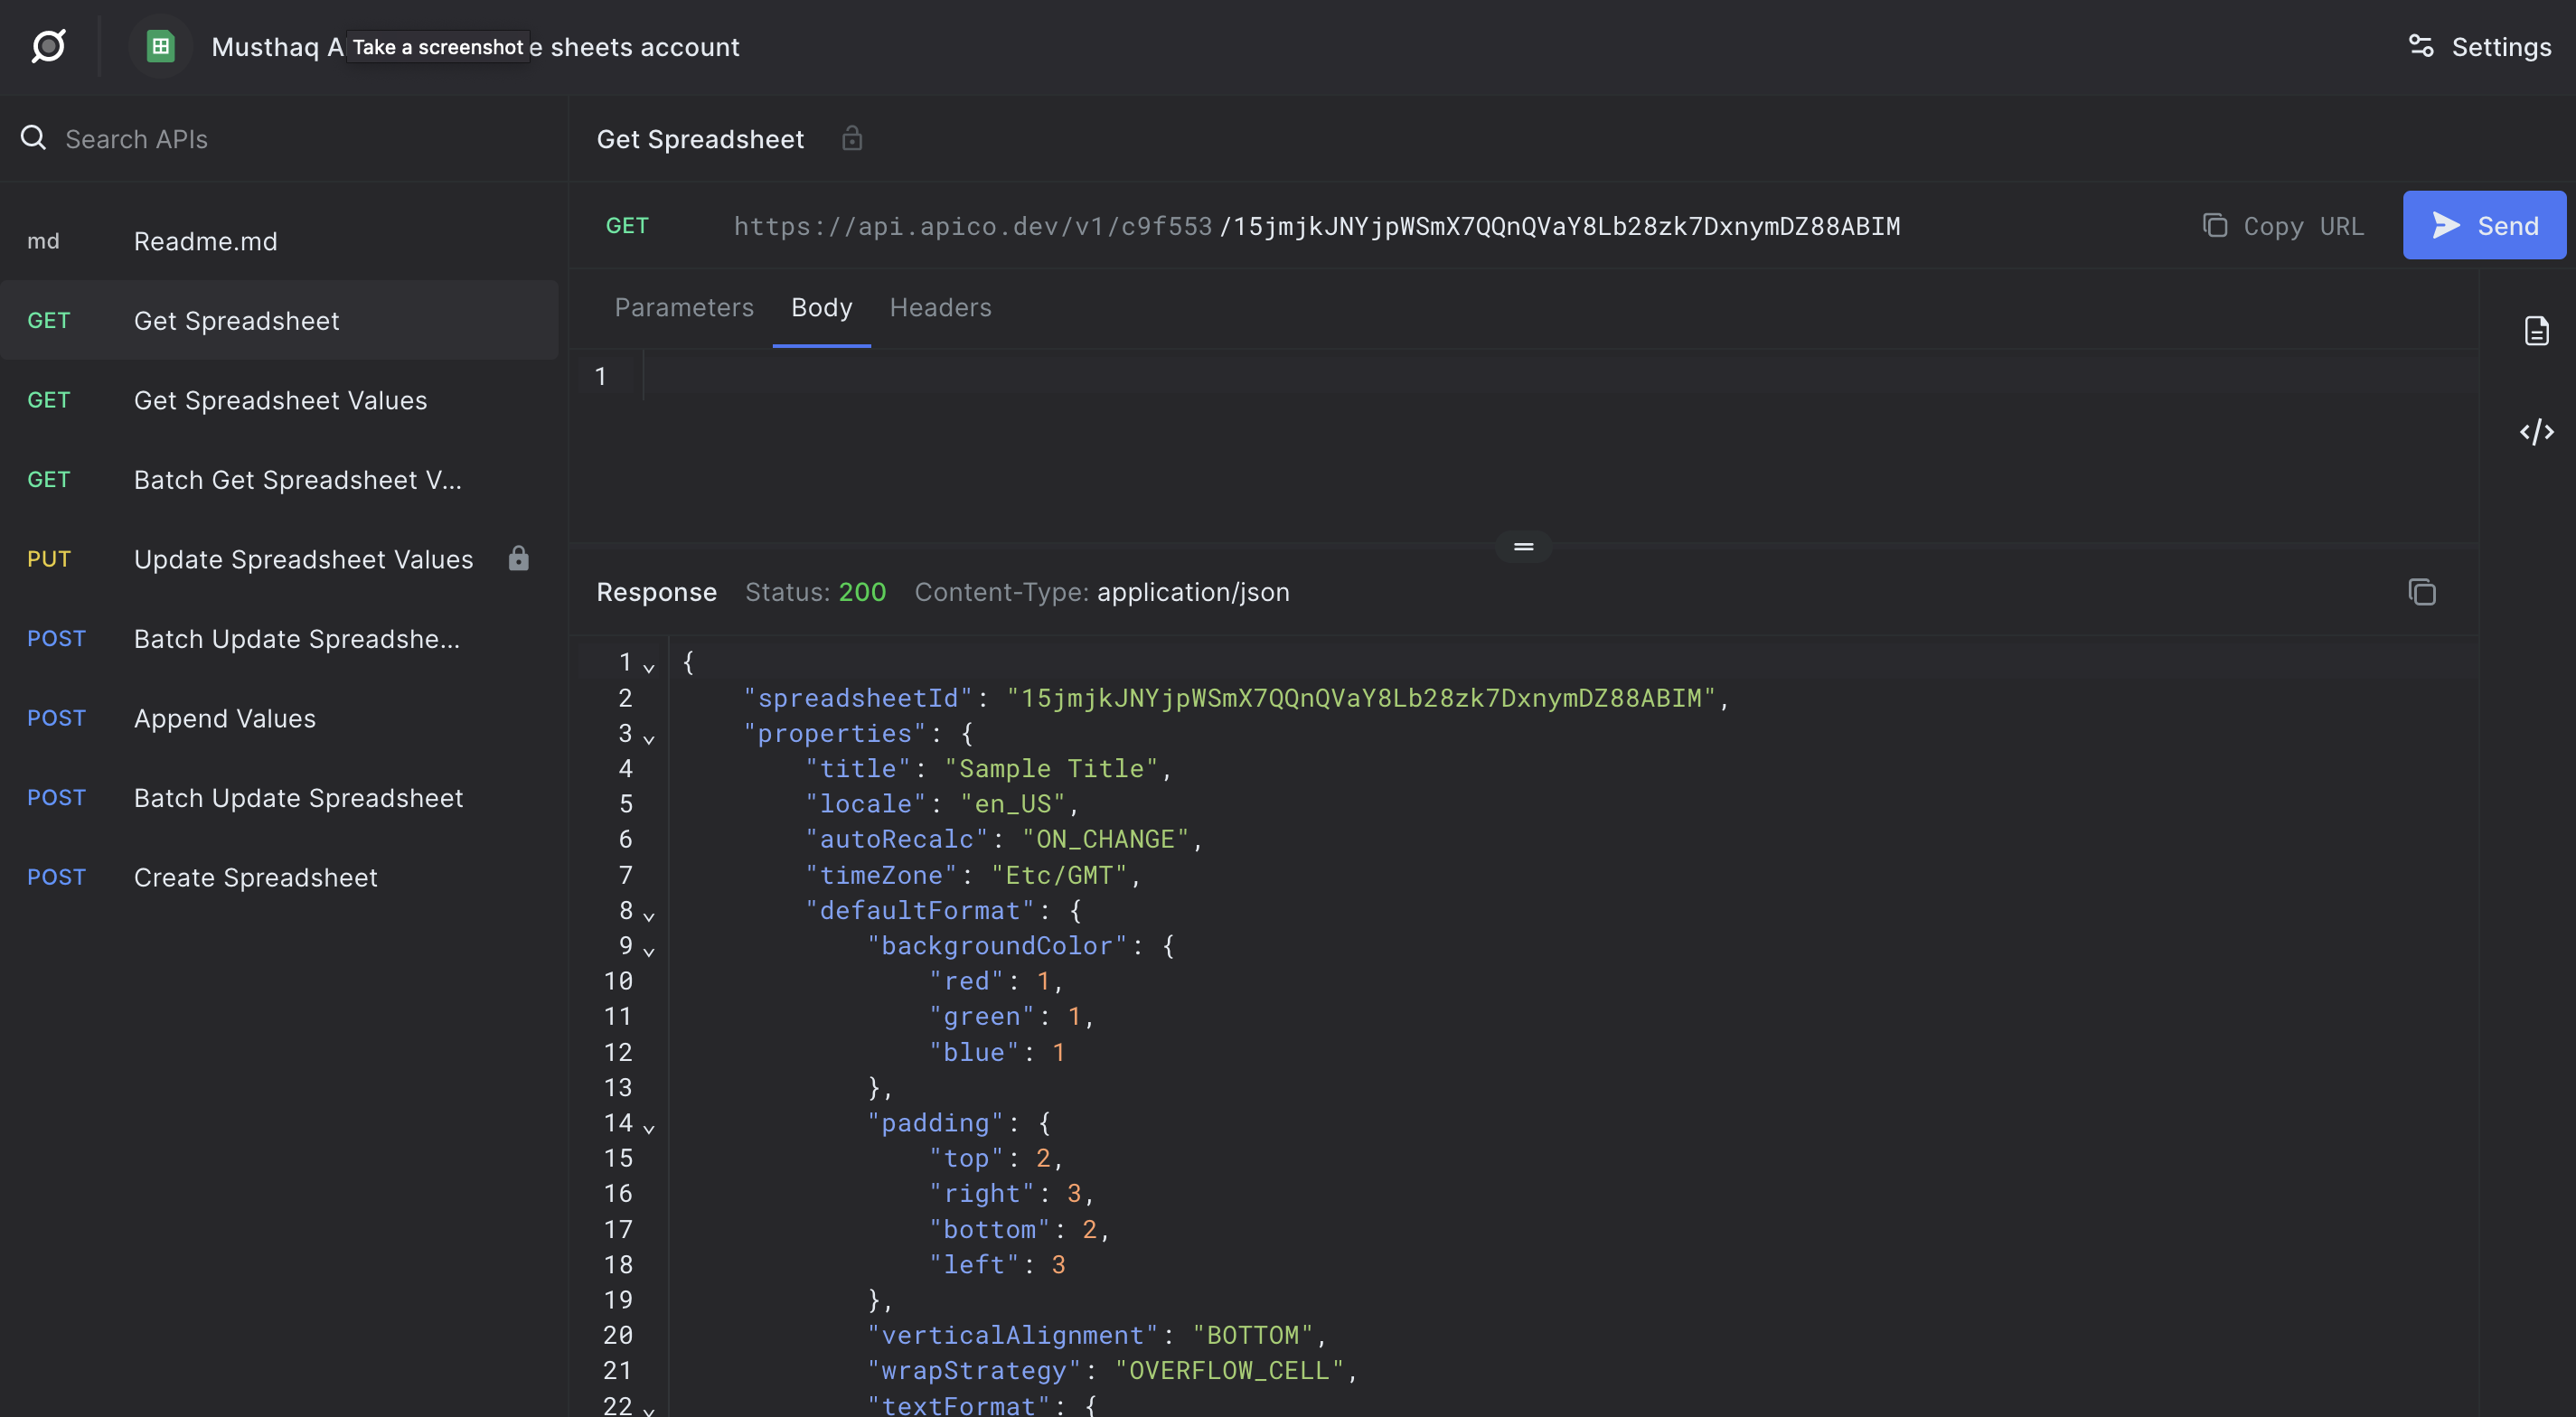
Now, click on "Send" to test out your API request. You should get a response with the details of your spreadsheet similar to this -
-
If you scroll down the JSON response, you will see an array named
sheetscontaining details of all the sheets/pages inside your spreadsheet. -
You can use the
titleproperty here to access individual Sheet values in other APIs mentioned in the following sections.
"sheets": [
    {
        "properties": {
            "sheetId": 0,
            "title": "Sheet1",
            "index": 0,
            "sheetType": "GRID",
            "gridProperties": {
                "rowCount": 1007,
                "columnCount": 26
            }
        }
    }
]
Insert new rows into your Google Sheet with Apico API
To insert new rows into your Sheet, you can use the Append values API from the API explorer on the left.
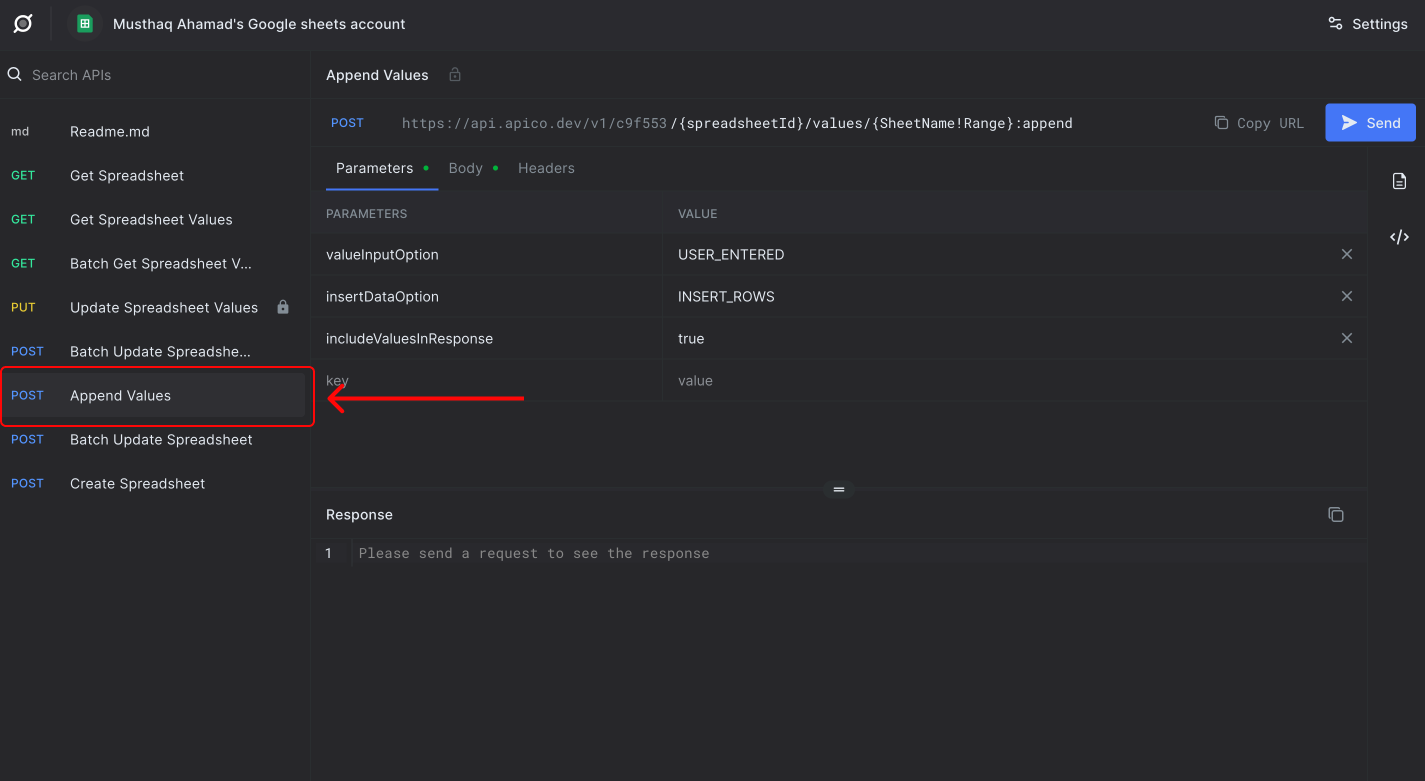
1. Replace the spreadsheetID and SheetName
The API endpoint will look similar to this -
https://api.apico.dev/v1/34sds332/{spreadsheetId}/values/{SheetName!Range}:append
Here, you can replace the {spreadsheetId} with the id of your spreadsheet. and {SheetName!Range} with the name of the sheet/page within your spreadsheet. You can refer the previous section to see how to get the page/sheet name.
Once you replace these variables, your URL will look similar to this -
https://api.apico.dev/v1/34sds332/15jmjk934nsdkj3434sdVaY8Lb28zk7DxnymDZ88ABIM/values/Sheet1:append
2. Add your new row values
Next, click on the Body section right below the address bar.
You will see a sample placeholder value similar to this -
{
    "values": [
        [
            "Value for column 1",
            "Value for column 2",
            "Value for column 3",
            "..and so on"
        ]
    ]
}
You can replace the text here to include individual values of each column sequentially.
In this example, we are inserting the details of a user into a sheet where the column headers are in the following order -
- name
- phone
- country
{
    "values": [
        [
            "Jhon Doe",
            "jhon@company.com",
            "+17283232328",
            "US"
        ]
    ]
}
3. Send your Google Sheets API request to insert a new row
Once you have updated the body, click on Send button to test the APIs out. Your Google Sheet will now be updated with the new values.
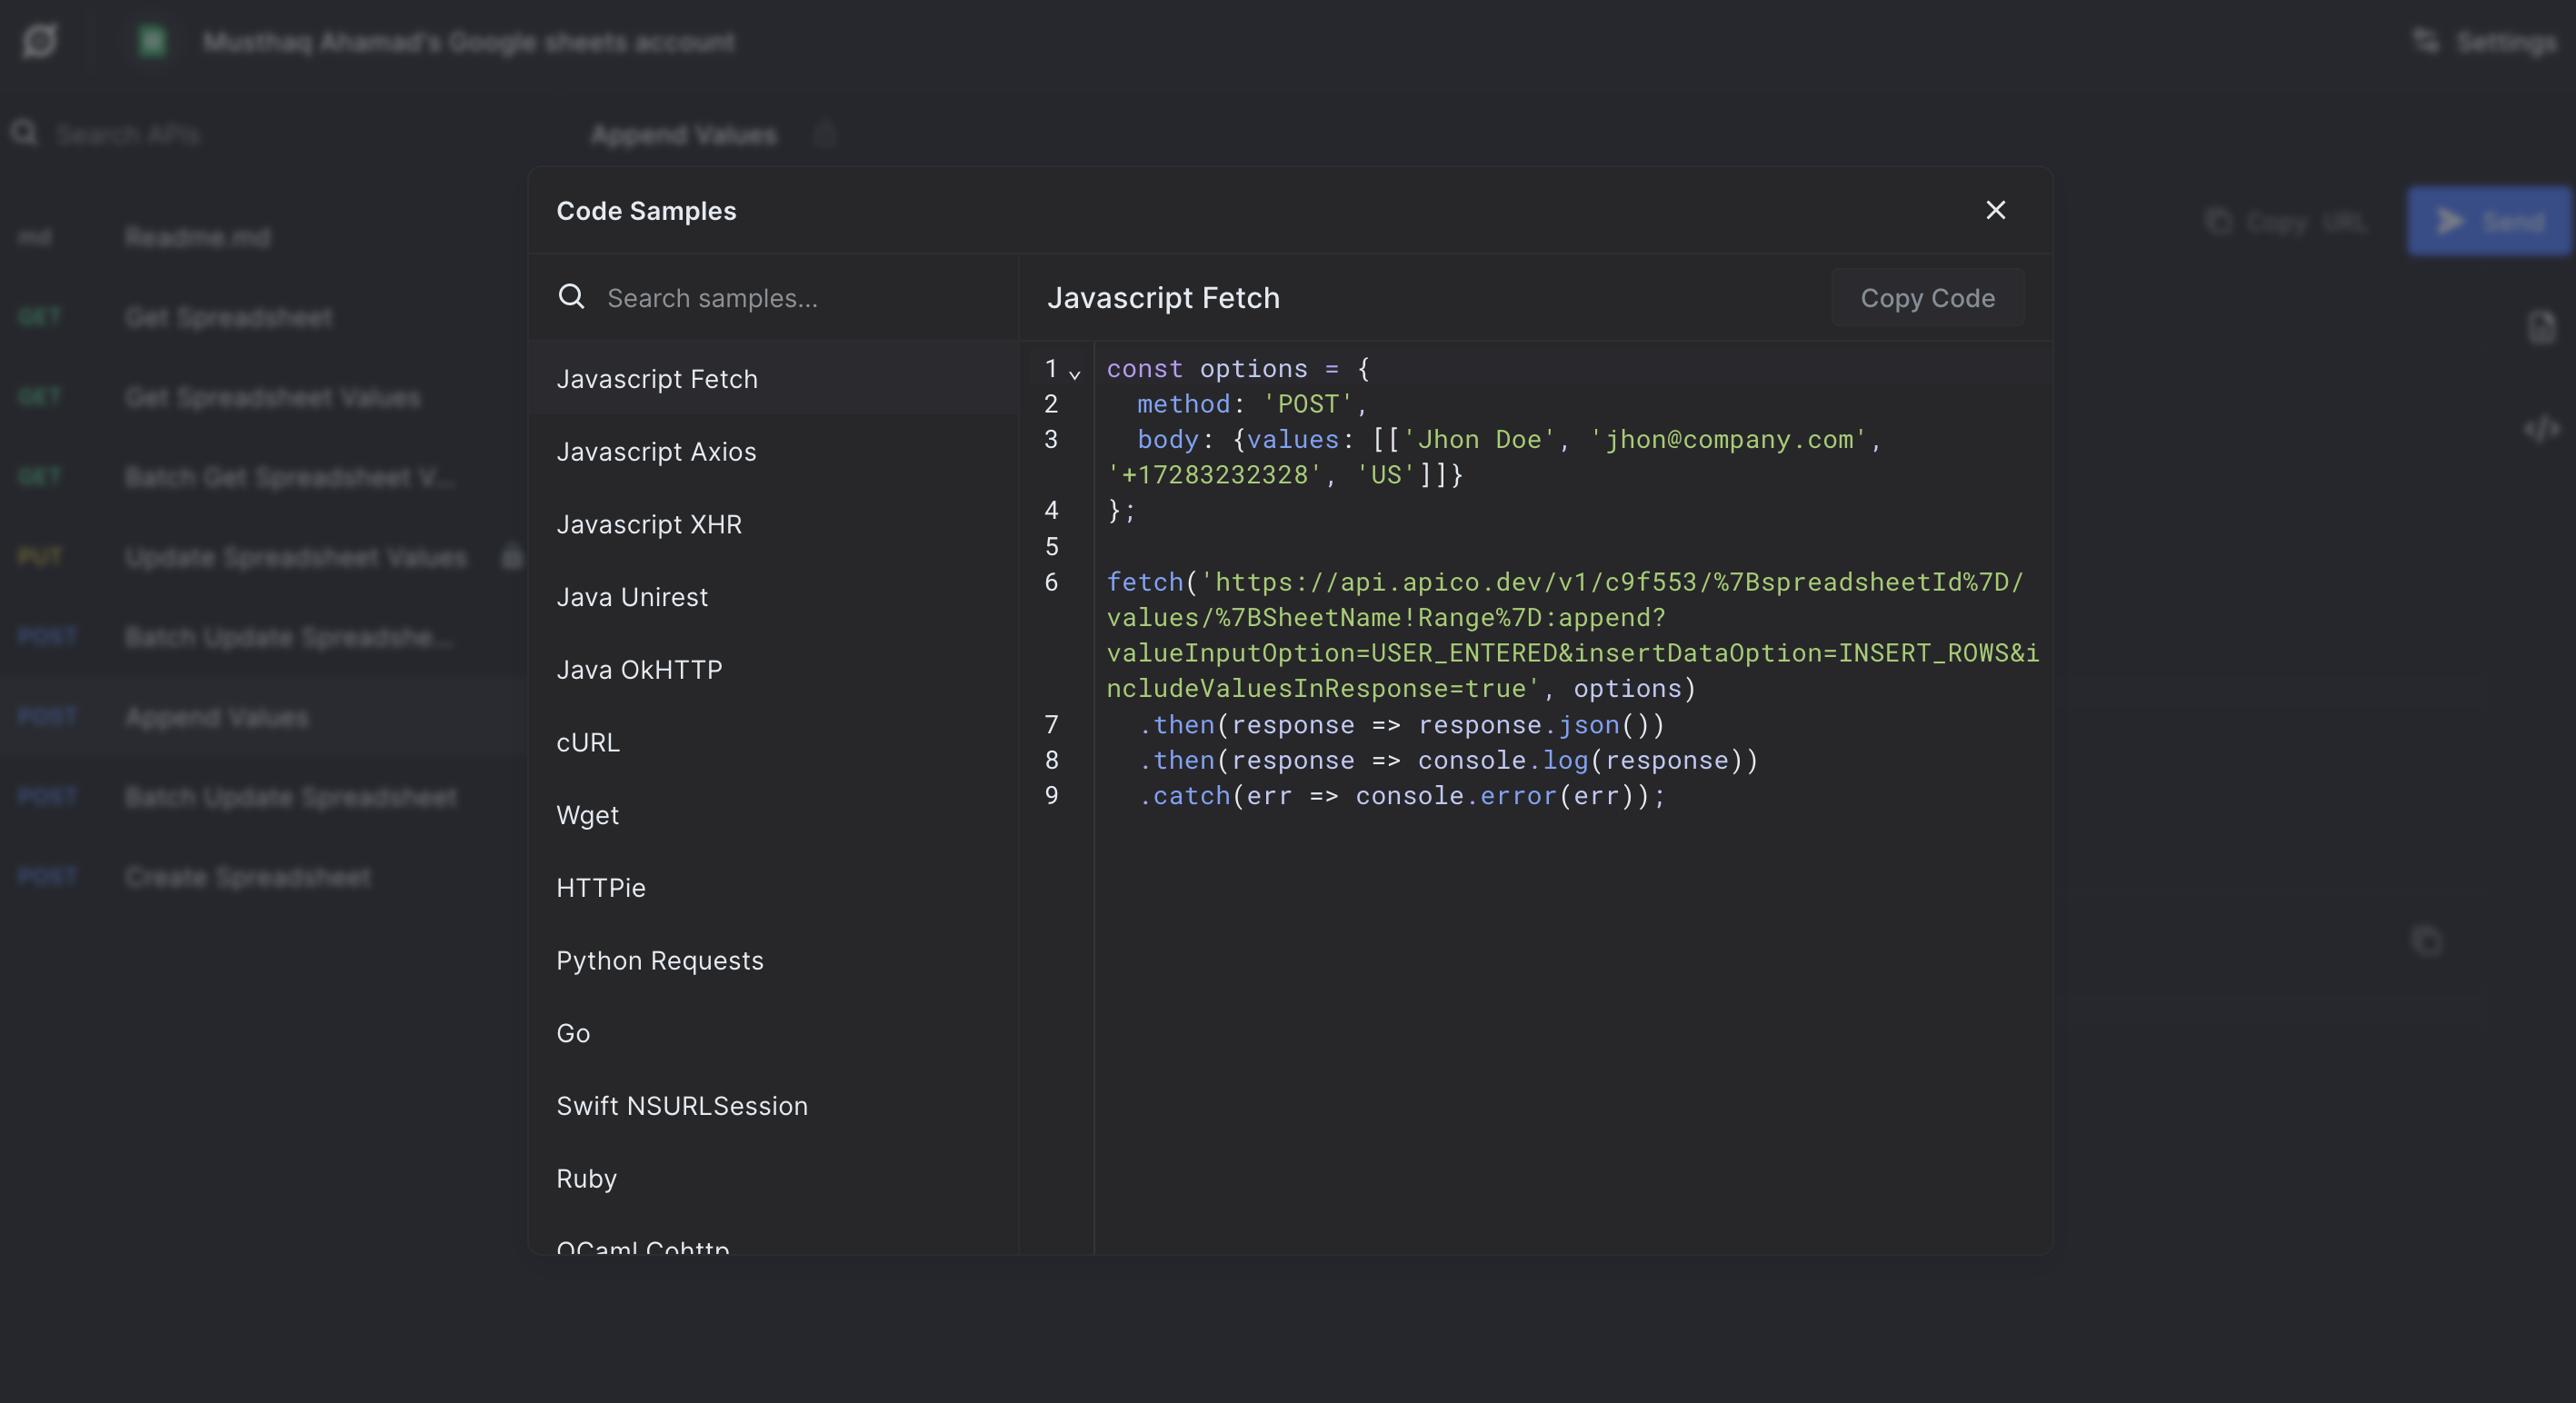
You can click on the code icon on the right side of the screen, just below the send button, to get the sample code on how to use this API in your applications.
Retrieve Data from your Google Sheet
To retrive data, you can use the Get Speadsgeet Values API from the API explorer on the left.
1. Replace the spreadsheetID and SheetName
The API endpoint will look similar to this -
https://api.apico.dev/v1/c9fsds343/{spreadsheetId}/values/{sheetName!Range}
Here, you can replace the {spreadsheetId} with the id of your spreadsheet. and {SheetName!Range} with the name of the sheet/page within your spreadsheet. You can refer the previous section to see how to get the page/sheet name.
Once you replace these variables, your URL will look similar to this -
https://api.apico.dev/v1/c9fsds343/15jmjk934nsdkj3434sdVaY8Lb28zk7DxnymDZ88ABIM/values//Sheet1
2. Send your Google Sheets API request to retrieve data
Once you hit on "Send" you should recieve the response containing rows of your sheet as a JSON array with the key values.
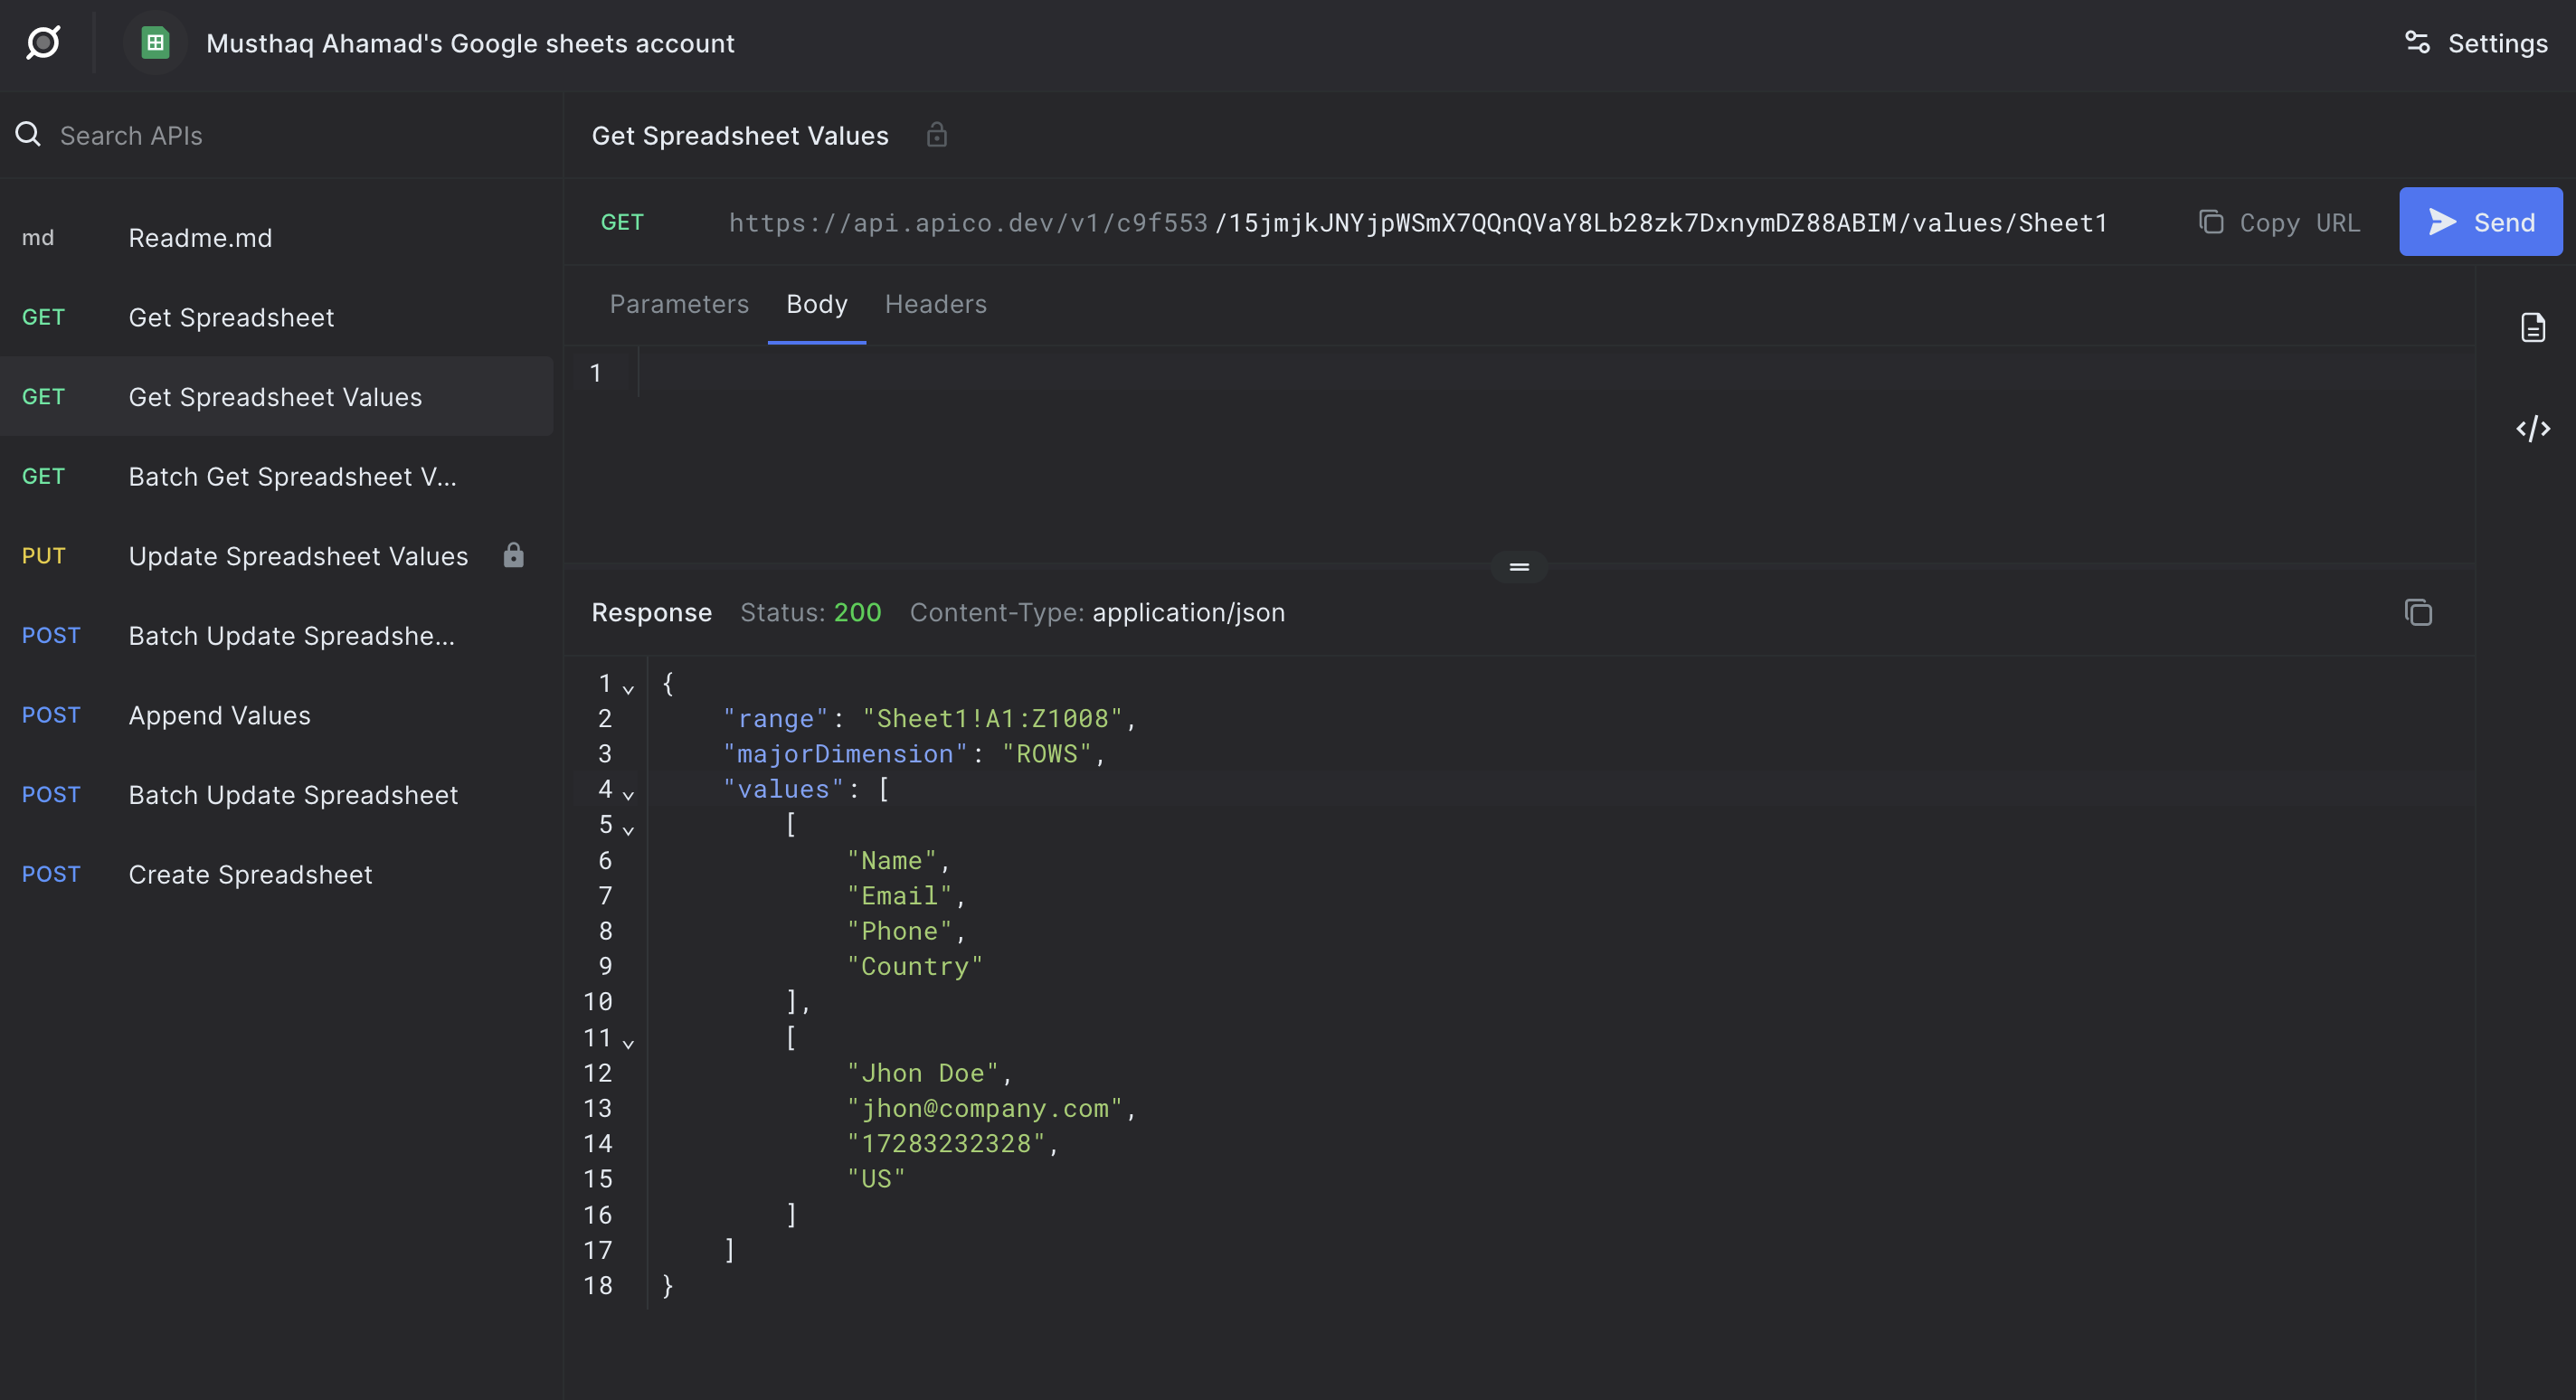
Your response will look similar to this -
{
    "range": "Sheet1!A1:Z1008",
    "majorDimension": "ROWS",
    "values": [
        [
            "Name",
            "Email",
            "Phone",
            "Country"
        ],
        [
            "Jhon Doe",
            "jhon@company.com",
            "17283232328",
            "US"
        ]
    ]
}
Note that, the first item in the values array in the header row of your spreadsheet. You can ignore that or use as an additional data to be used within your application.
Next, you can click on the code icon on the right side to get the code samples on how to use this in your applications.
Creating new Google Sheet using Apico API
Using Apico APIs, you can also create new spreadsheets in your Google account. You can use the Create Spreadsheet API from the API explorer on the left to access this API.
1. Specifying the spreadsheet name and sheet names
You can head over to the Body of the API request and rename the title field inside properties to give your spreadsheet a name.
You can find the number of sheets and their prioerties inside your spreadsheet inside the sheets property.

The response will contain the spreadsheetId and aother properties of the sheet which you can use with Apico APIs.
Ready to use Google Sheets as a Database and Backend?
Now you have learned how to use these APIs you can head over to your Apico account to create the APIs and get started building! You can also integrate other applications like Slack, Airtable and a lot more to create APIs and use it in your apps as a backend.