Send Webflow Form Submissions to Google Sheets

Webflow forms are one of the easiest way to collect data from your website visitors. Integrating your Webflow forms into a Google sheets can open up a lot of use-cases.
Here are a few things that you can do by sending your Webflow form submissions to Google sheet -
- Lead Generation and Follow-up:
- Capture leads through Webflow forms.
- Automatically send form submissions to a designated Google Sheet.
- Sales or marketing teams can then use the sheet to prioritize and follow up with leads efficiently.
- Event Registrations:
- Create a registration form for events using Webflow.
- Integrate with Google Sheets to keep a real-time list of attendees.
- Easily manage event logistics and communication based on the submitted data.
- Survey and Feedback Collection:
- Design surveys or feedback forms on Webflow.
- Connect the forms to Google Sheets for systematic analysis.
- Gain insights from the collected data and make informed decisions.
- Job Applications:
- Streamline job application processes by using Webflow forms.
- Send applications directly to a Google Sheet for HR teams to review and manage.
- Facilitate a more organized and collaborative hiring process.
- Customer Support Requests:
- Allow users to submit support requests through Webflow forms.
- Transfer the requests to a Google Sheet for customer support teams to prioritize and address efficiently.
- Track the status of requests and ensure timely responses.
- Product Orders and Reservations:
- Manage product orders or reservations through Webflow forms.
- Integrate with Google Sheets for a centralized order processing system.
- Enhance order tracking and inventory management.
- Newsletter Subscriptions:
- Collect newsletter subscriptions via Webflow forms.
- Send subscriber information to a Google Sheet for mailing list management.
- Ensure a seamless communication process with your audience.
- User Feedback for Website Improvements:
- Gather user feedback on website usability or design.
- Integrate Webflow forms with Google Sheets for comprehensive analysis.
- Implement website improvements based on the collected feedback.
These use cases demonstrate the versatility of integrating Webflow form submissions with Google Sheets, streamlining various processes across marketing, sales, HR, and customer support.
Preparing a Google Sheet to be used with Webflow Forms
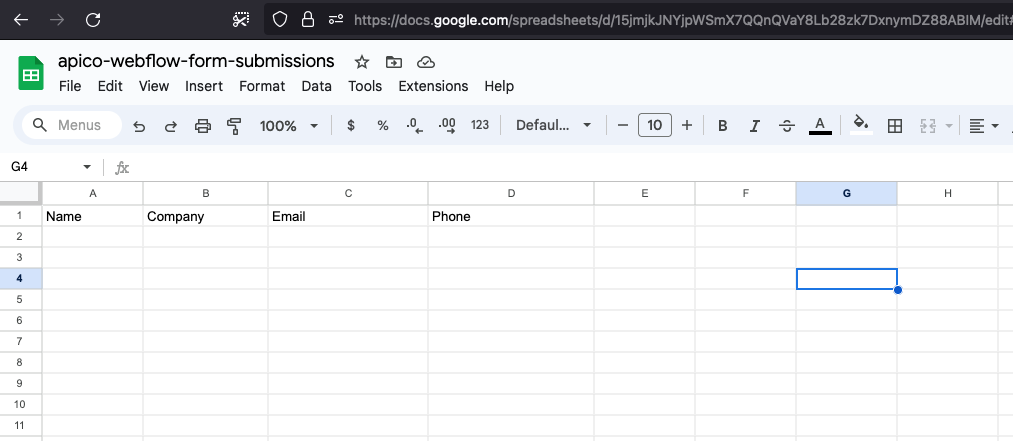
- Head over your Google Sheets account and create a new Sheet to store Webflow submissions.
- Use the first row of your sheet to add the column names corresponding to the data you wish to collect via a form. Eg. If you are planning create a form for lead generation, create the following header columns in Google Sheet.
- Name
- Company
- Phone
- Note the URL of your Google Sheet, we will need it in the next step to integrate with our Webflow Form
Creating a Form in Webflow
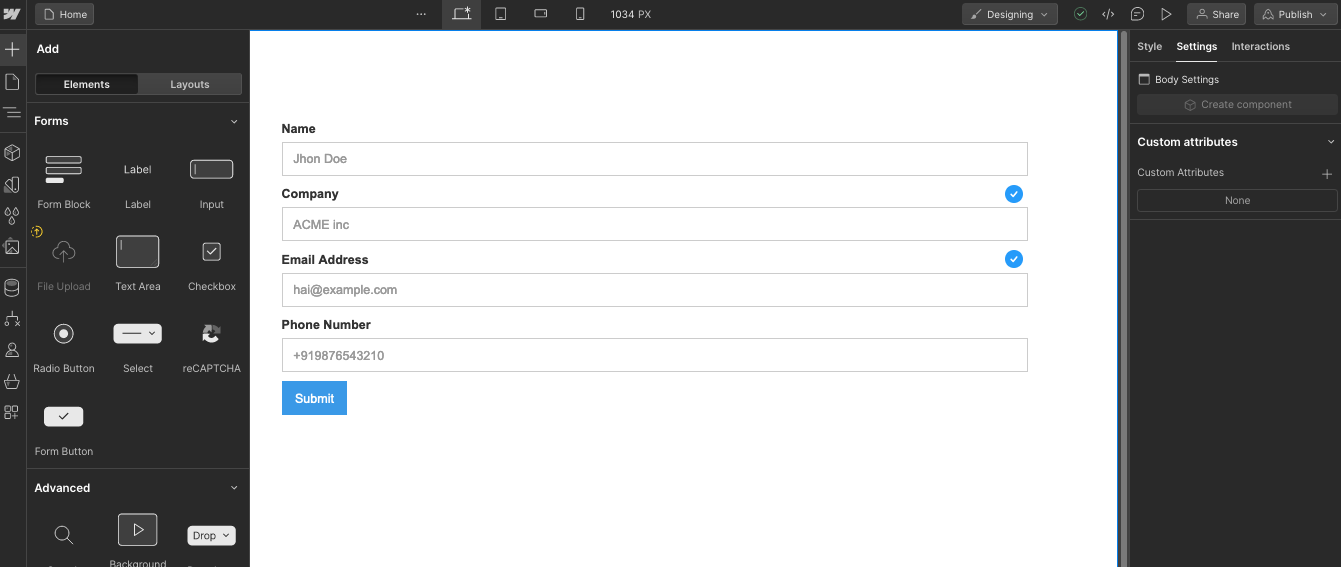
Once you are ready with a Google Sheet to store the form submissions, we can start and create a new form. If you already have a form, match the column names in your form to header column names in Google Sheet.
Here's how you can create a new form in your Webflow site -
- Head over to your Webflow account and open the site you want to add the form
- Once the Webflow designer opens up, click on the plus button on the side bar and scroll down to forms.
- Drag and drop the form into a page and start configuring the input field you want users to fill. In our case we need 4 fields for Name, Company, Email and Phone.
- Make sure each input field have correct names given from the right side menu.
Creating an Apico API to access Google Sheet
After creating the form, let's create an Apico API that can help us access the Google Sheets. Apico is a free service that will help us connect with Google Sheets and a lot of other apps within a click.
Here's how you can get the Google Sheets API via Apico -
- Go to your Apico account (if you are a new user, you can signup for a free account)
- Click on Create new API and select Google Sheets as your App
- Authorise your Google Sheet account which contains the sheet we just created.
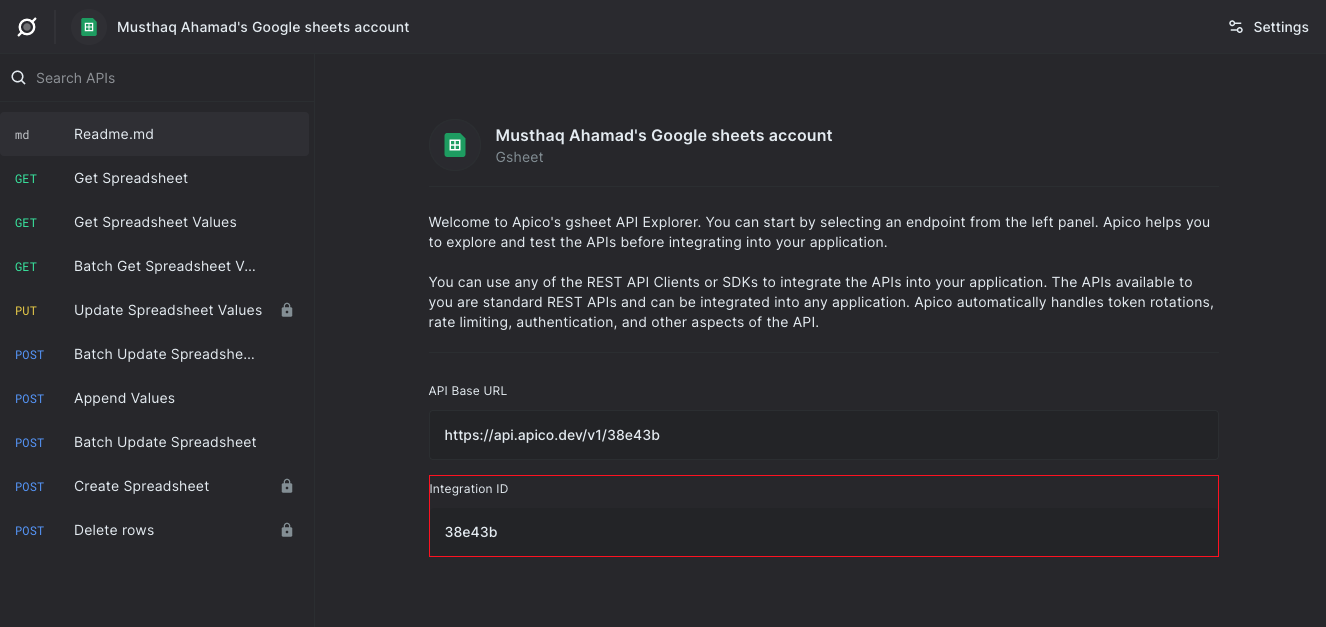
- Once you have authorised, Apico will show all the APIs you can use with your Google Sheet account.
- Note down the integration id of your Apico integration from the Readme.md file
Creating a Webflow Logic to send form submissions to Google Sheets
We need to configure a Logic in Webflow to send data to Google Sheets whenever a form is submitted. This can be a simple HTTP request flow on a form submission trigger.
Her's how to setup a HTTP request flow on form submission -
-
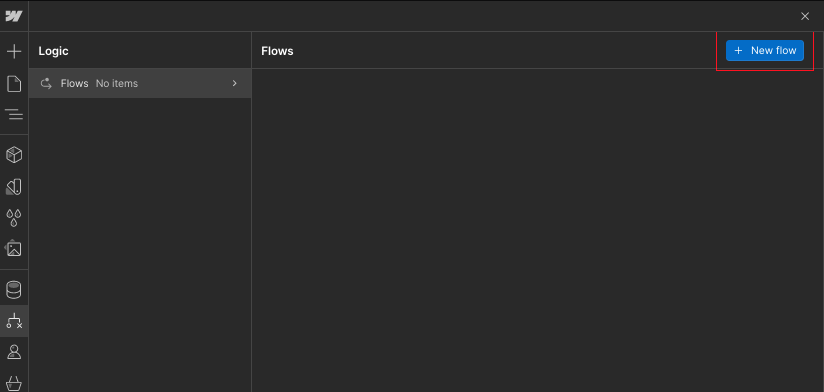
From your left side bar, click on Logic, and click on flows and click on "+ New Flow" from top right to create a new flow
-
Make sure to give a nice name to your Flow from the right side panel, in our case we will name it "Apico Google Sheets-form-submission"
-
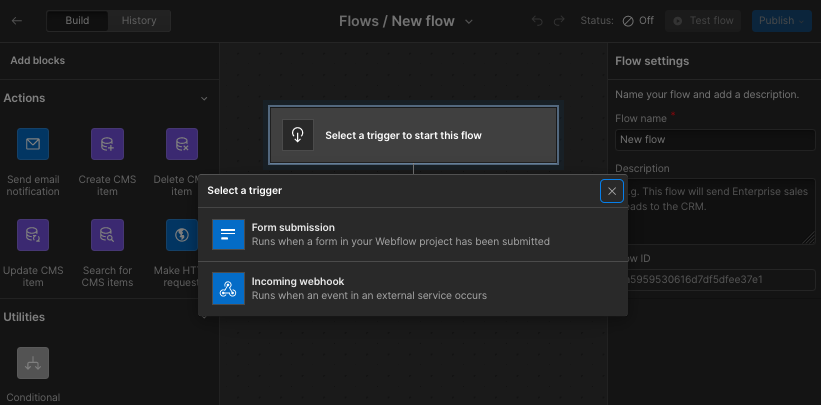
Select the first step in your flow and change it to Form Submission as the trigger.
-
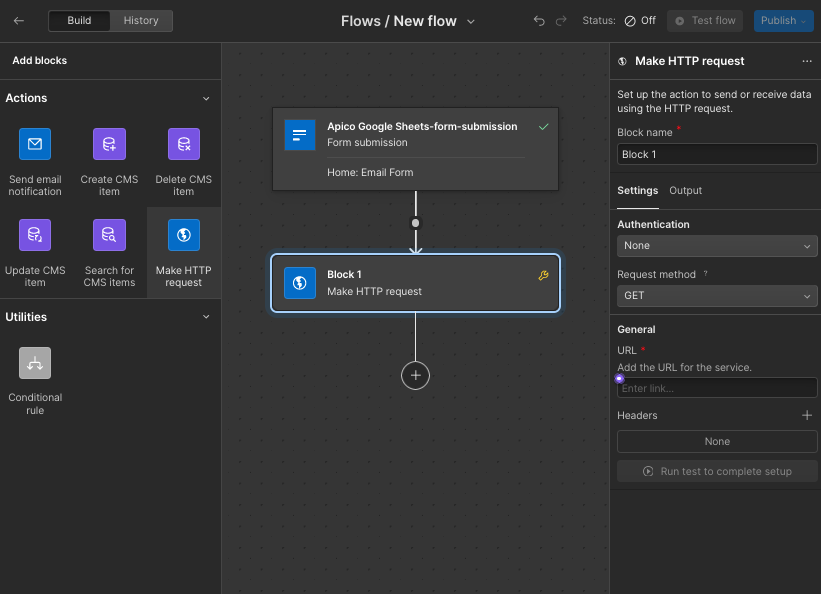
On the right-hand side under the settings section you can pick the form that created in the previous step.
-
From the right hand-side click and drag the HTTP Request option into the "+" icon on the second step.
Configuring HTTP Request on Webflow
-
Select the second step and head over to the right side of the screen to start configuring the block.
-
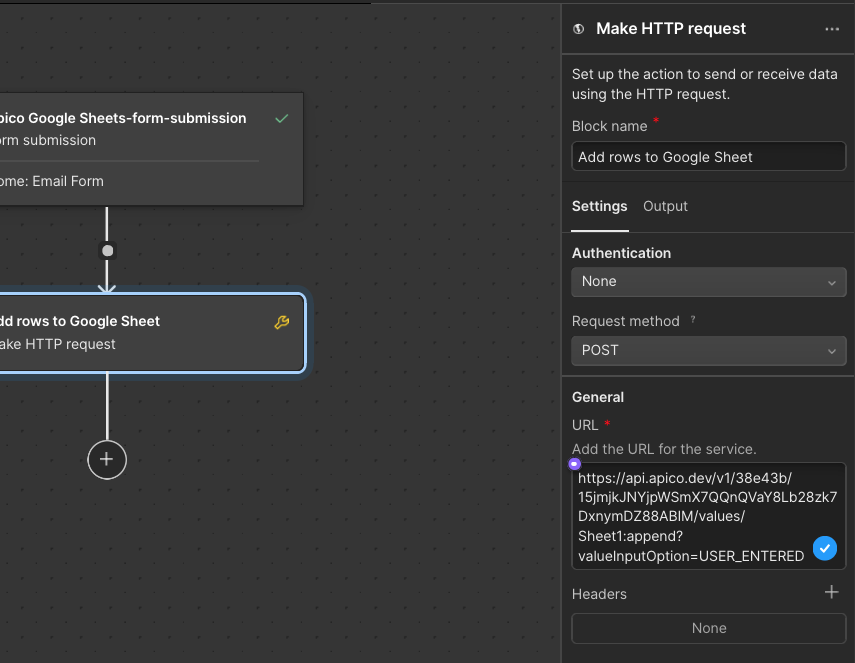
Change the block name to "Add rows to Google Sheet"
-
Under settings tab, keep Authentication as
Noneand Request Method asPost -
In the General section change the URL to the following
https://api.apico.dev/v1/{apico_integration_id}/{spreadsheetId}/values/Sheet1:append?valueInputOption=USER_ENTEREDChange the
{apico_integration_id}to the integration id you got from Apico, and change the{spreadsheet_id}to the id of your spreadsheet. You can get the id of your spreadsheet from the URL of your Google Sheets page.If your Goole Sheets URL looks something like this -
https://docs.google.com/spreadsheets/d/15jmjkJNYjpWSmX7QQnQVaY8Lb28zk7DxnymDZ88ABIM/edit#gid=0The string between
/d/and/editis yourspreadsheetId. In this case thespreadsheetIdwill be15jmjkJNYjpWSmX7QQnQVaY8Lb28zk7DxnymDZ88ABIM
- Now, in the Body section add the following JSON. You can replace the individual values with the fields from the form using the tiny purple dot near the input area.
{
    "values": [
        [
            "value 1",
            "value 2",
            "value 3",
            "value 4"
        ]
    ]
}
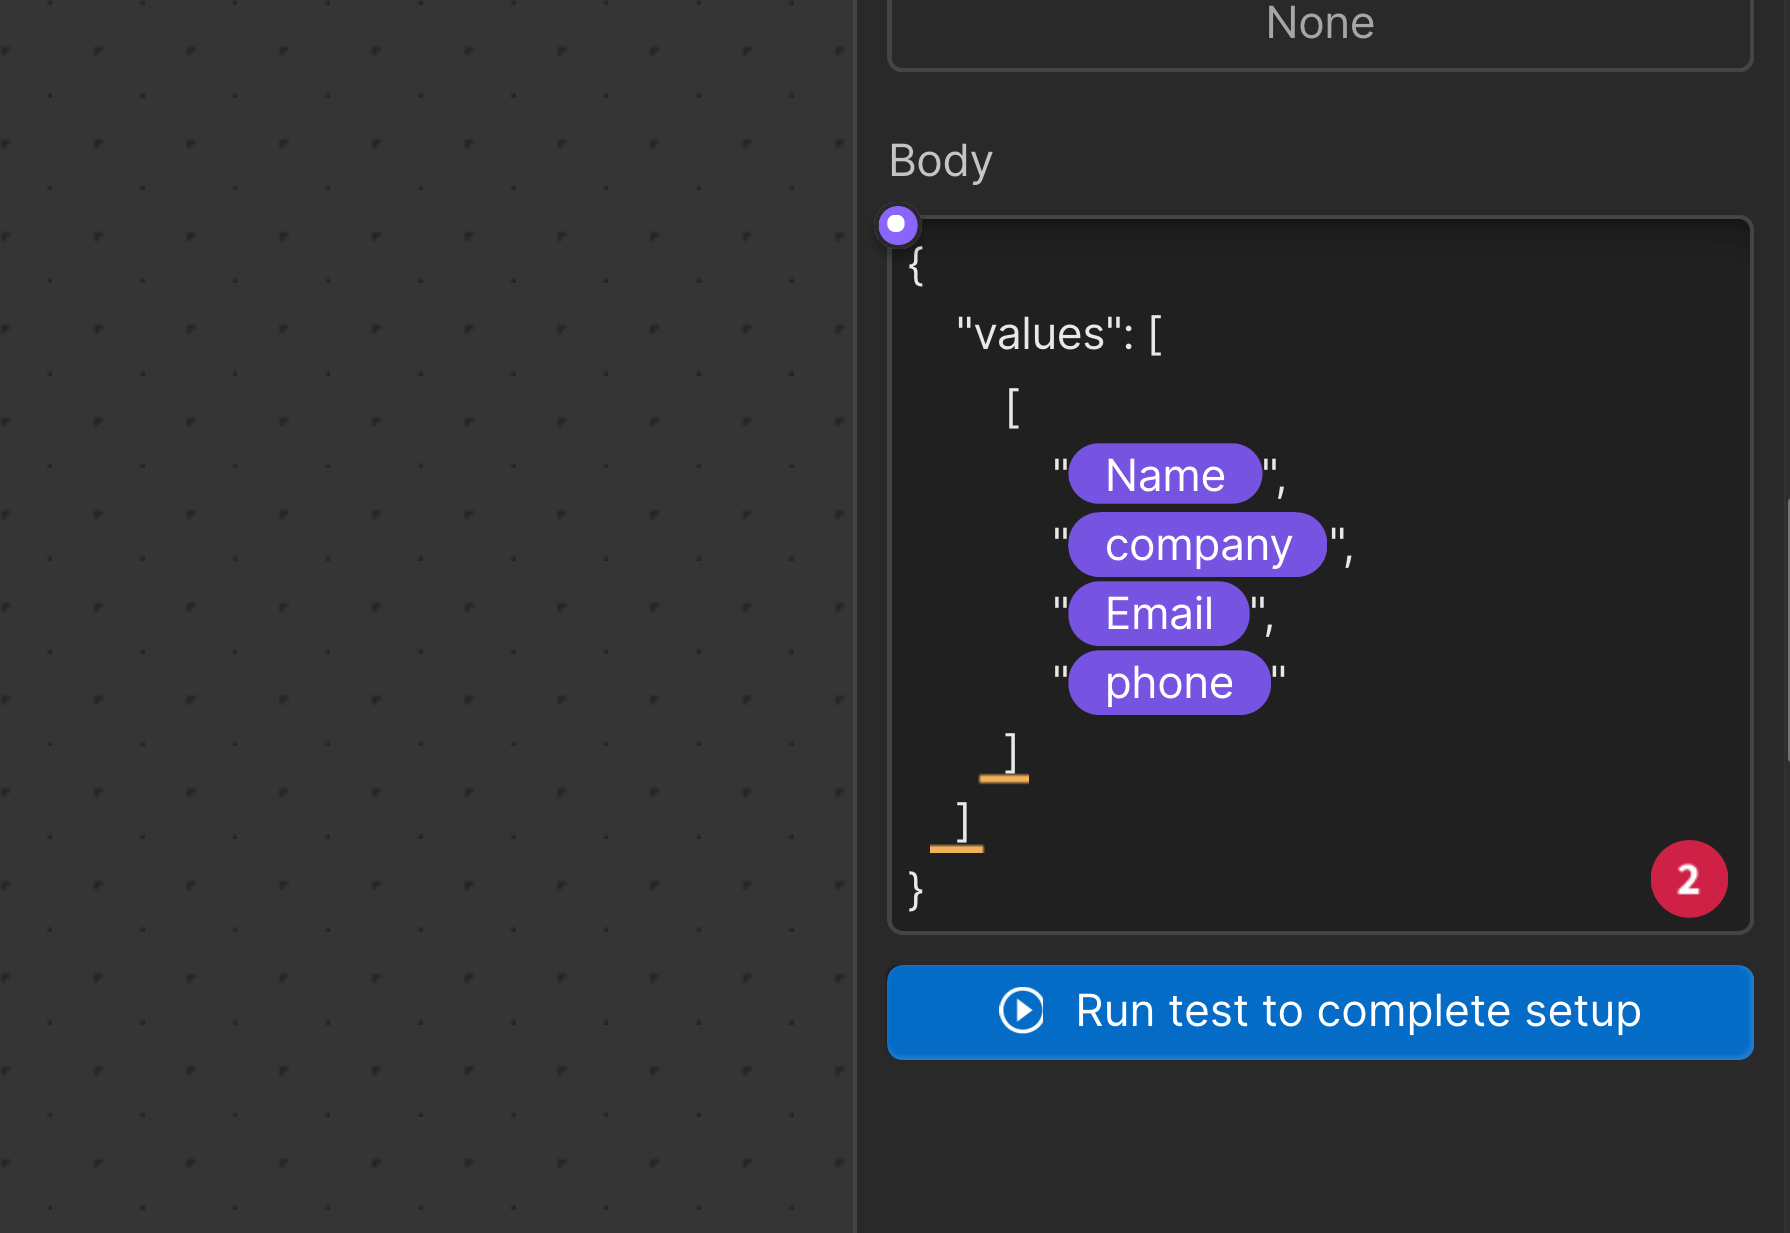
- Make sure the variables are arranged in same order as the columns in your Google Sheet.
- For fields which are marked as required, you might have to provide fallback values. You will see a tiny wrench icon next to the variable, on clicking on the gear icon you will be able to set a fallback value.
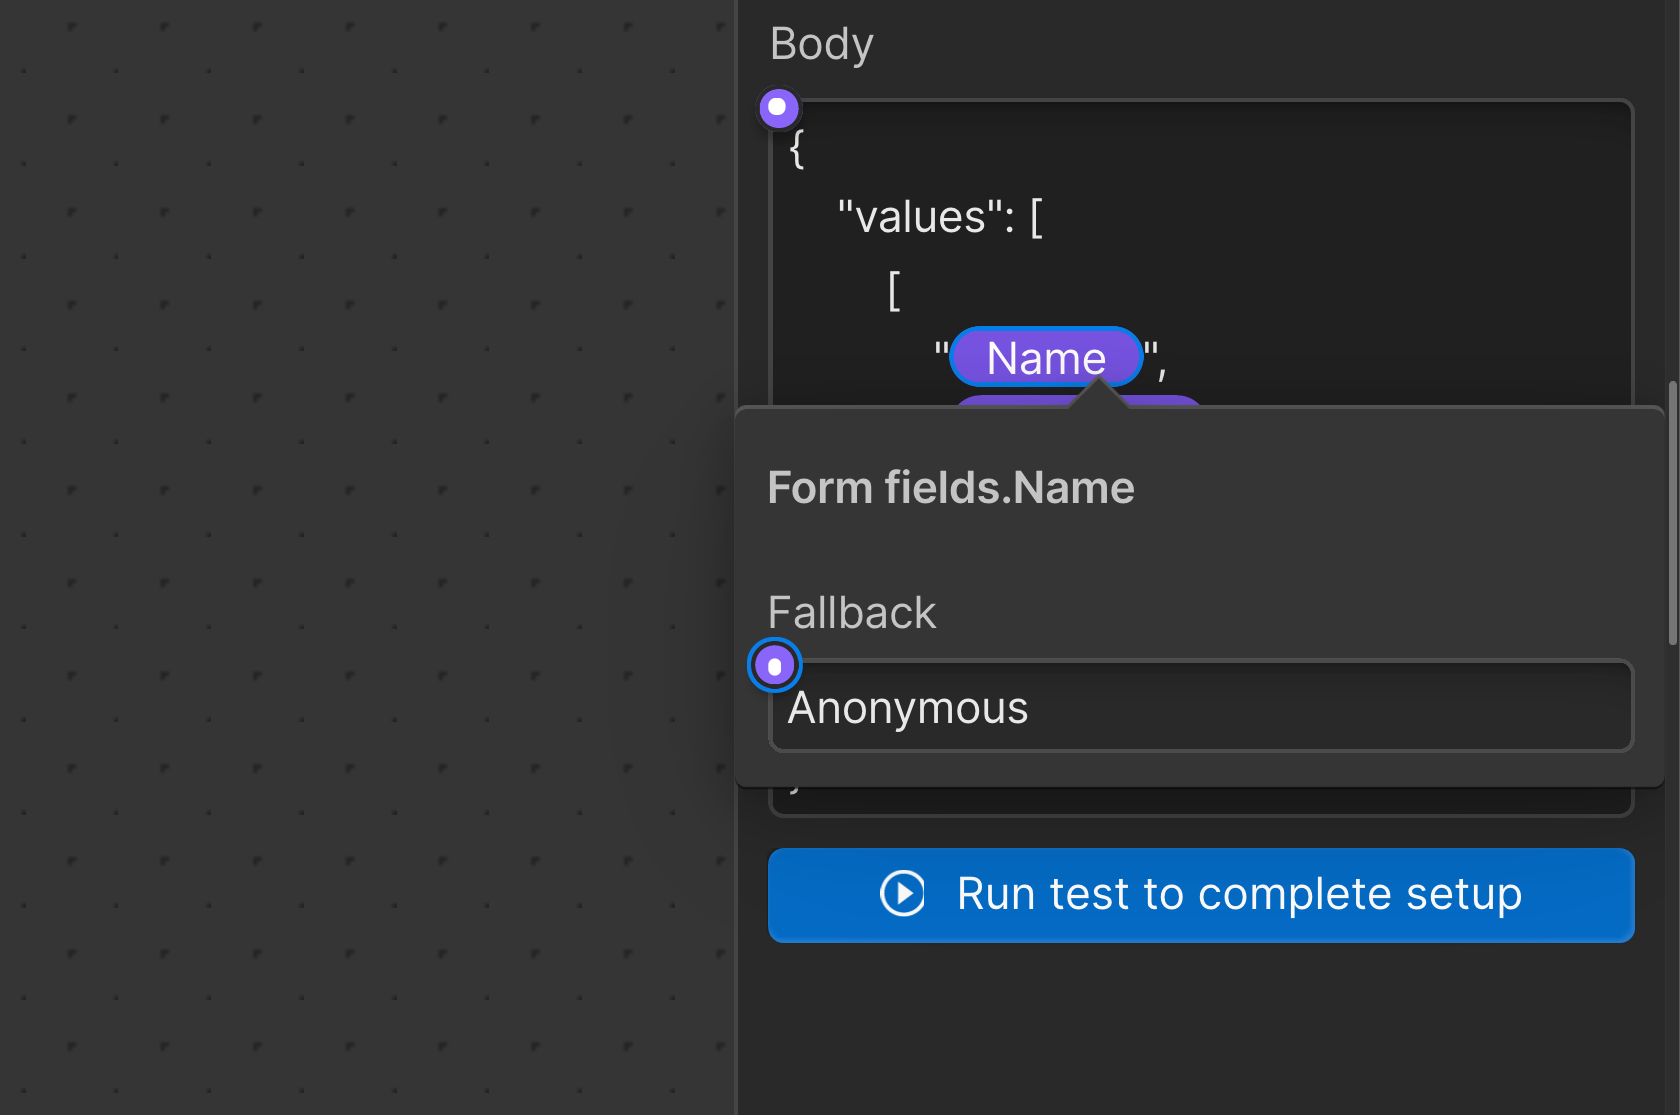
- Once this is done, click on "Run test to complete the setup"
Testing the HTTP Request flow
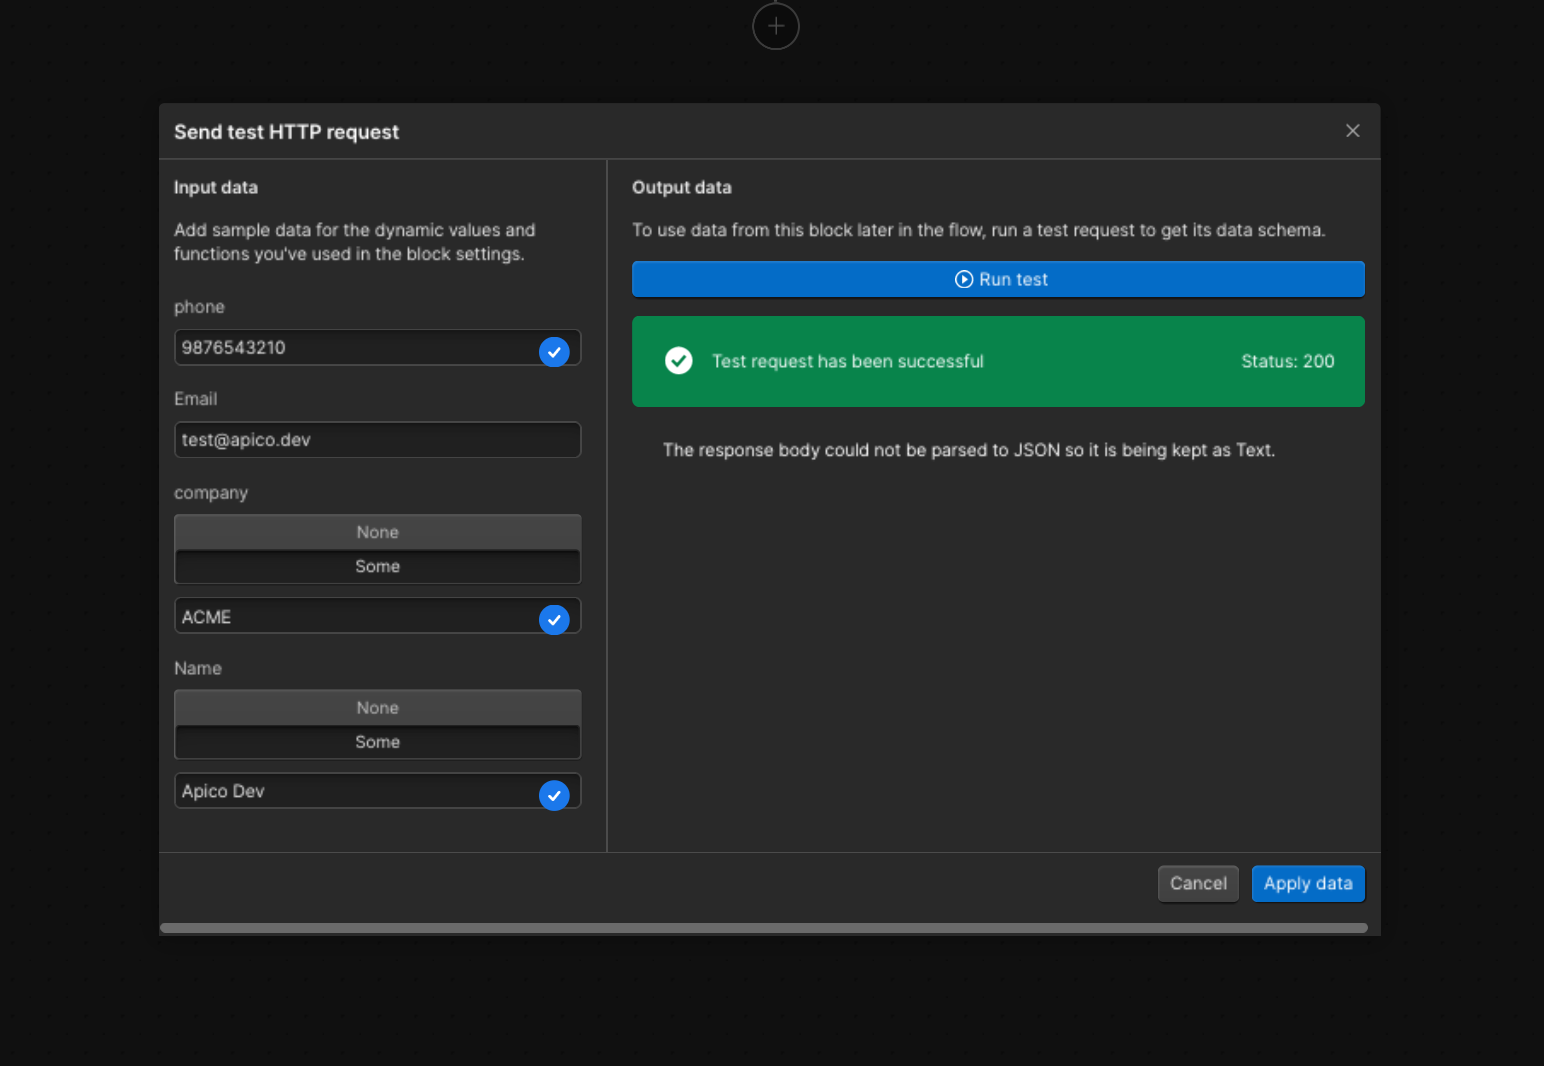
Before publishing the flow, we need to confirm if the flow actually works. Once you click on "Run test to complete setup", a modal will be opened asking you to fill the necessary details and complete the test with sample values.
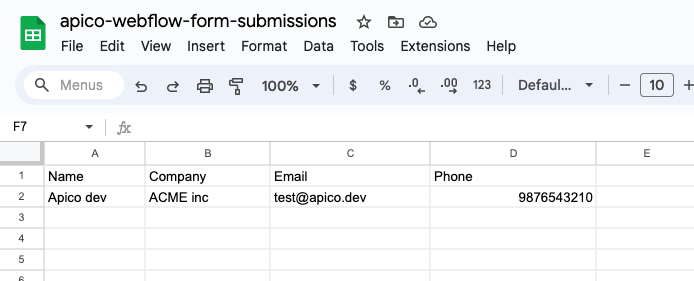
Fill the fields with sample values and click on "Run test". If the test runs successfully, your google sheets will have the sample values with which we just ran the test.
Click on "Apply data" button on the modal to make sure the changes are saved.
Publishing the changes
Once we are done testing the changes. Click on "Publish" at the top right of the window to get the changes live on your website.
Start sending your Webflow submissions to Google Sheets
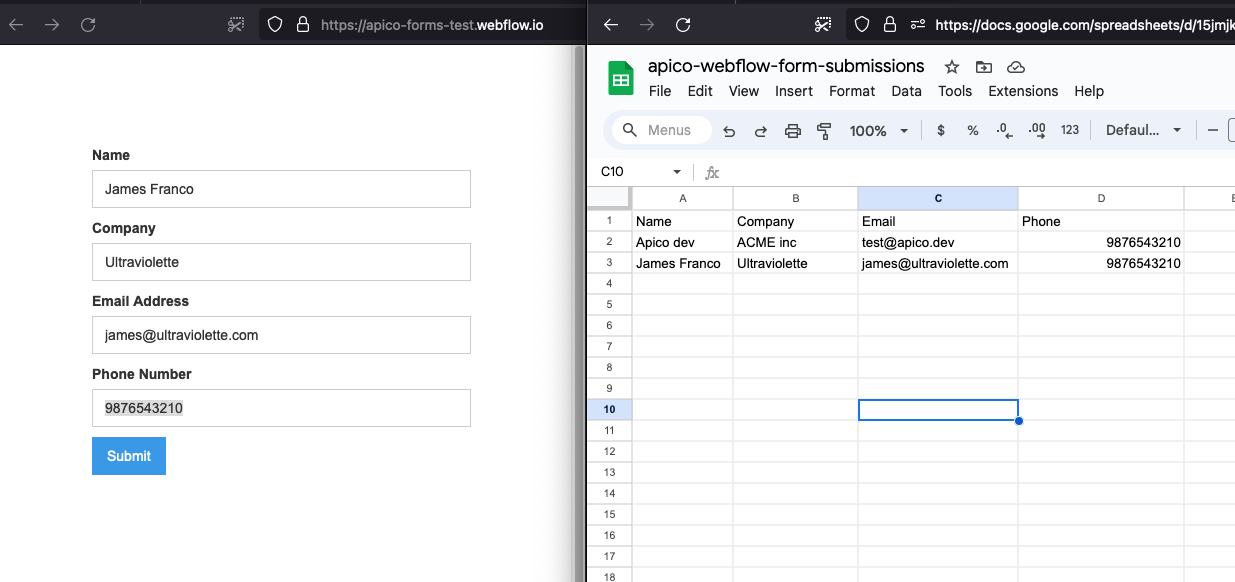
You can now open your live website and fill the form to see the submissions are being submitted to the Google Sheet.
Similarly, you can configure other providers like Hubspot, Intercom and more to be used with your Webflow site with Apico